You're planning a birthday bash and want a showstopper dessert that's pure joy without the hassle of an ice cream maker. This ice cream birthday dessert delivers creamy, colorful layers everyone will love.
Imagine scooping into swirls of homemade vanilla ice cream tinted for fun, packed with sprinkles, on a crunchy cookie base. It's no-churn magic—easy for you to whip up ahead.
No more store-bought disappointments. You'll create a festive centerpiece that screams celebration, freezing while you party prep.
How To Make Ice Cream Birthday Dessert
This no-churn ice cream birthday dessert is a layered cake with creamy vanilla base, pastel colors, crunchy cookie crust, and sprinkle-packed fun. It boasts smooth, scoopable texture with bursts of crunch and sweetness—perfectly festive and crowd-pleasing.
Ingredients
- 14 oz sweetened condensed milk – the sweet base for creaminess without cooking.
- 2 cups heavy whipping cream, cold – whips into airy peaks; chill it first.
- 1 tsp vanilla extract – pure flavor boost.
- Gel food coloring (pink and blue) – a few drops for vibrant birthday layers.
- 2 cups crushed chocolate cookies (like Oreos) – for the no-bake crust; about 24 cookies.
- 1/2 cup rainbow sprinkles – plus extra for topping; nonpareils hold best.
- 1 cup whipped cream (store-bought or homemade) – for festive rosettes on top.
- Birthday candles – 6-8 colorful ones for the wow factor.
Step-By-Step Instructions
Step 1: Prepare the Cookie Crust Base
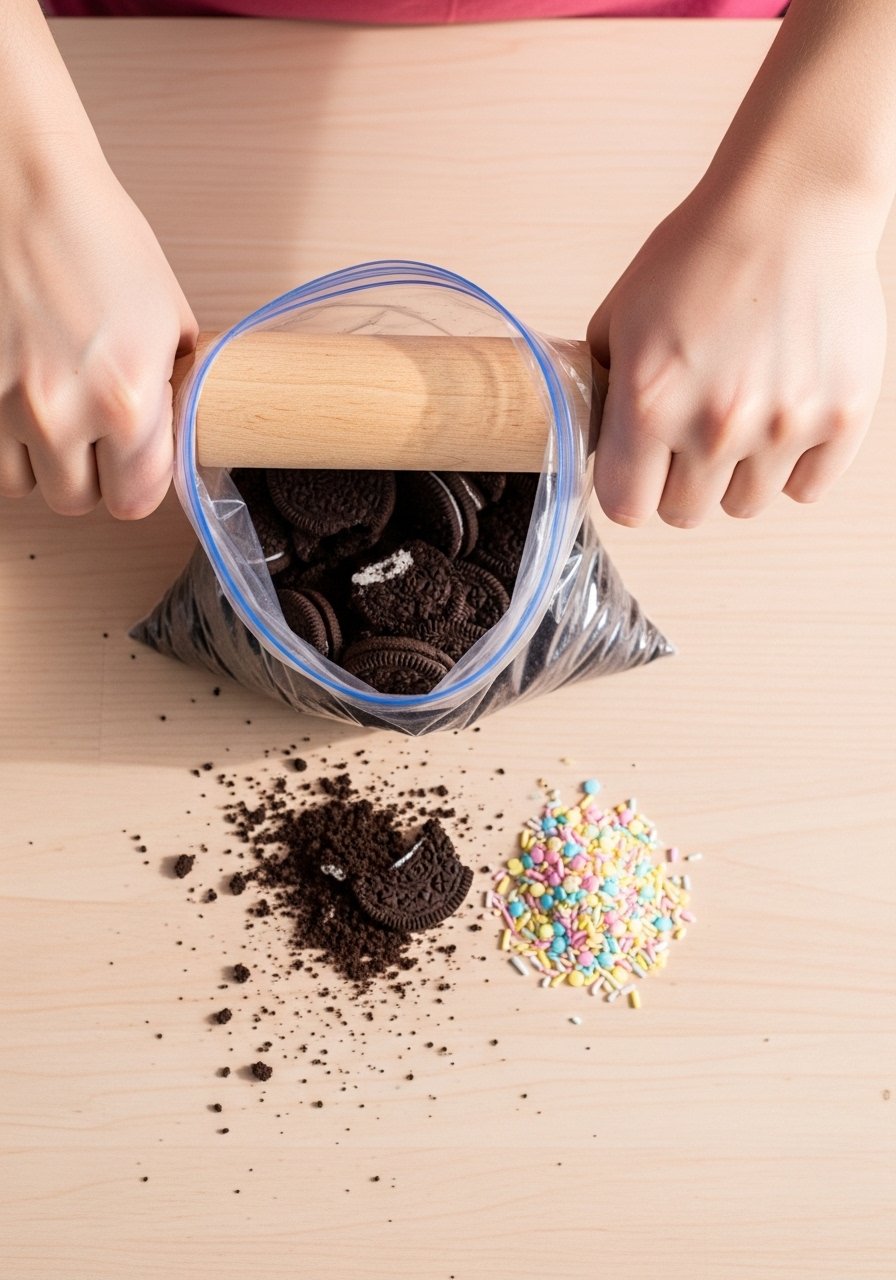
Start by crushing your cookies into fine crumbs—this forms a sturdy, chocolatey foundation that won't soggy up. Place cookies in a zip-top bag and use a rolling pin to bash them evenly. You'll need about 1 1/2 cups crumbs for the bottom layer.
Mix in 2 tbsp melted butter if crumbs feel dry (optional for extra hold). Press firmly into an 8-inch springform pan lined with parchment. This chill-ahead base sets in the freezer while you whip cream, saving time.
Step 2: Whip the Cream Base
Pour cold heavy cream into a large bowl and whip on medium-high with an electric mixer until stiff peaks form, about 3-4 minutes. Don't overwhip or it turns buttery—stop when it holds shape.
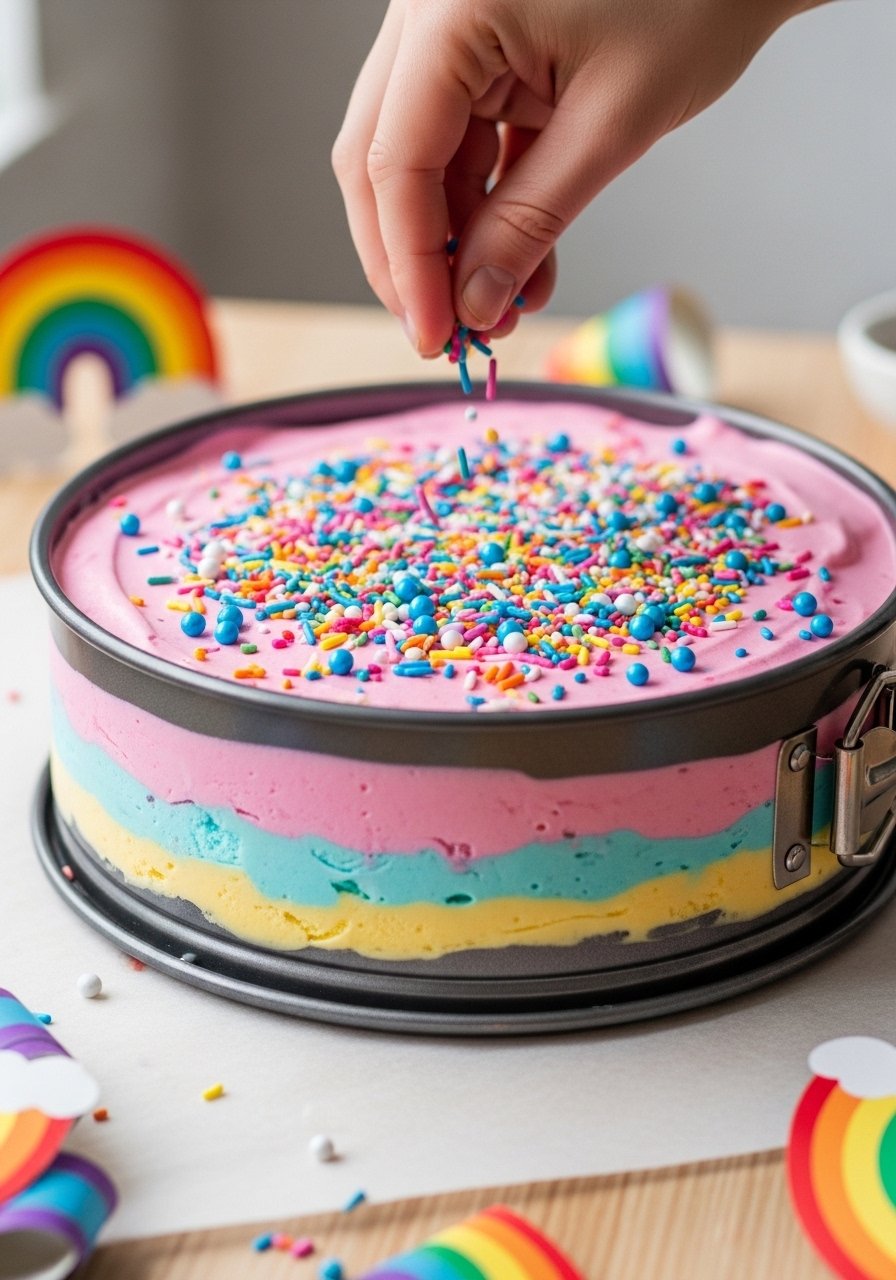
Gently fold in condensed milk and vanilla until smooth and streak-free. This no-cook method traps air for lightness. Divide into three bowls: one plain, one pink-tinted, one blue. Fold 2 tbsp sprinkles into each for crunch.
Step 3: Layer the Ice Cream
Spread plain mixture over crust, then freeze 30 minutes to firm. Add pink layer, sprinkle more on top, freeze another 30 minutes. Finish with blue layer and extra sprinkles. Smooth top with an offset spatula.
Cover tightly with plastic wrap and freeze 6-8 hours or overnight. Layering prevents muddled colors, giving Instagram-worthy stripes that wow at birthdays.
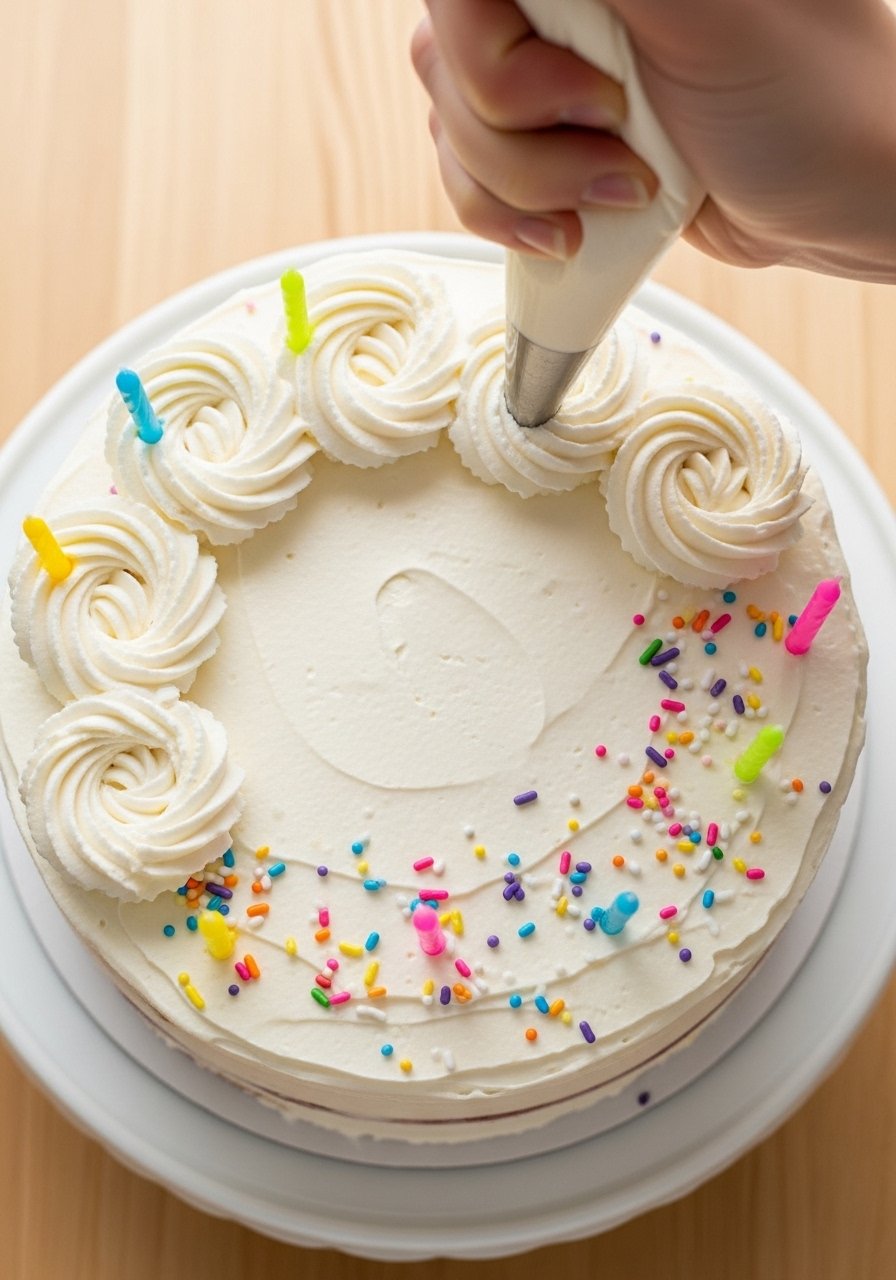
Step 4: Decorate and Serve
Once firm (test with a knife), unmold by running a hot knife around edges. Pipe whipped cream rosettes around the edge using a star tip.
Scatter sprinkles and insert candles. Let soften 10-15 minutes at room temp for easy slicing. This final flourish makes it feel store-bought fancy.
Customization Ideas
Make it personal with mix-ins. Swirl in crushed birthday cake bits into one layer for cake batter vibes, or add mini chocolate chips for extra indulgence.
Food coloring lets you match party themes—swap pink/blue for green/gold. Keep portions kid-sized by cutting into wedges.
Taste-test as you go; a dash of extract amps fruit flavors if using purees.
Tips for Perfect Texture
Chill everything first—bowl, cream, beaters—for faster whipping and fluffier results. If cream won't peak, it's often not cold enough.
Avoid big air pockets during layering; tap the pan gently on the counter. Freezer burn? Double-wrap after 24 hours.
Use gel colors—they won't water down the mix like liquid ones. These tweaks ensure pro-level smoothness every time.
Common Mistakes to Avoid
Don't skip the freeze times between layers; rushing leads to smears. Overmixing deflates cream—fold gently like egg whites.
Springform pans shine here for easy release; foil-wrapped regular pans work but stick more. Measure precisely—too much condensed milk makes it icy.
Storage and Serving Tips
Freeze leftovers tightly wrapped up to 2 weeks—thaw slices 10 minutes before serving.
Serve on chilled plates to keep shape; pair with fresh berries for contrast. Slice with a hot, sharp knife for clean cuts.
Portion for 8-10; it's rich, so small wedges satisfy.
Final Thoughts
You've nailed a birthday hero that's simple yet stunning. Watch faces light up as they dig into those colorful layers.
Feel that baker's confidence—you made magic from scratch. Next party, it's even easier.