Craving a fancy dessert without turning on the oven? You've got this. No-bake mini dessert cups are your quick fix for parties or sweet cravings.
These little treats layer up in minutes, perfect when time's short or heat's not an option.
They're beginner-proof, customizable, and always a crowd-pleaser.
How To Make No Bake Mini Dessert in Cup
These no-bake mini dessert cups deliver creamy, crunchy layers in cute glass cups. A buttery cookie base holds a fluffy cheesecake filling topped with fresh berries for a burst of flavor. Light yet indulgent, they're ready to chill and serve in under 30 minutes.
Ingredients
- 1 ½ cups graham cracker crumbs (or crushed digestive biscuits for that perfect crunch)
- 6 tablespoons unsalted butter, melted (binds the base without sogginess)
- 8 oz cream cheese, softened (full-fat for richest creaminess)
- ½ cup powdered sugar (sifted for smoothness)
- 1 cup heavy whipping cream, cold (whips into airy peaks)
- 1 teaspoon vanilla extract (enhances all flavors)
- 1 cup fresh mixed berries (strawberries, blueberries for color and tang)
- ¼ cup chocolate shavings or sauce (optional drizzle for extra decadence)
Makes 6-8 mini cups.
Step-By-Step Instructions
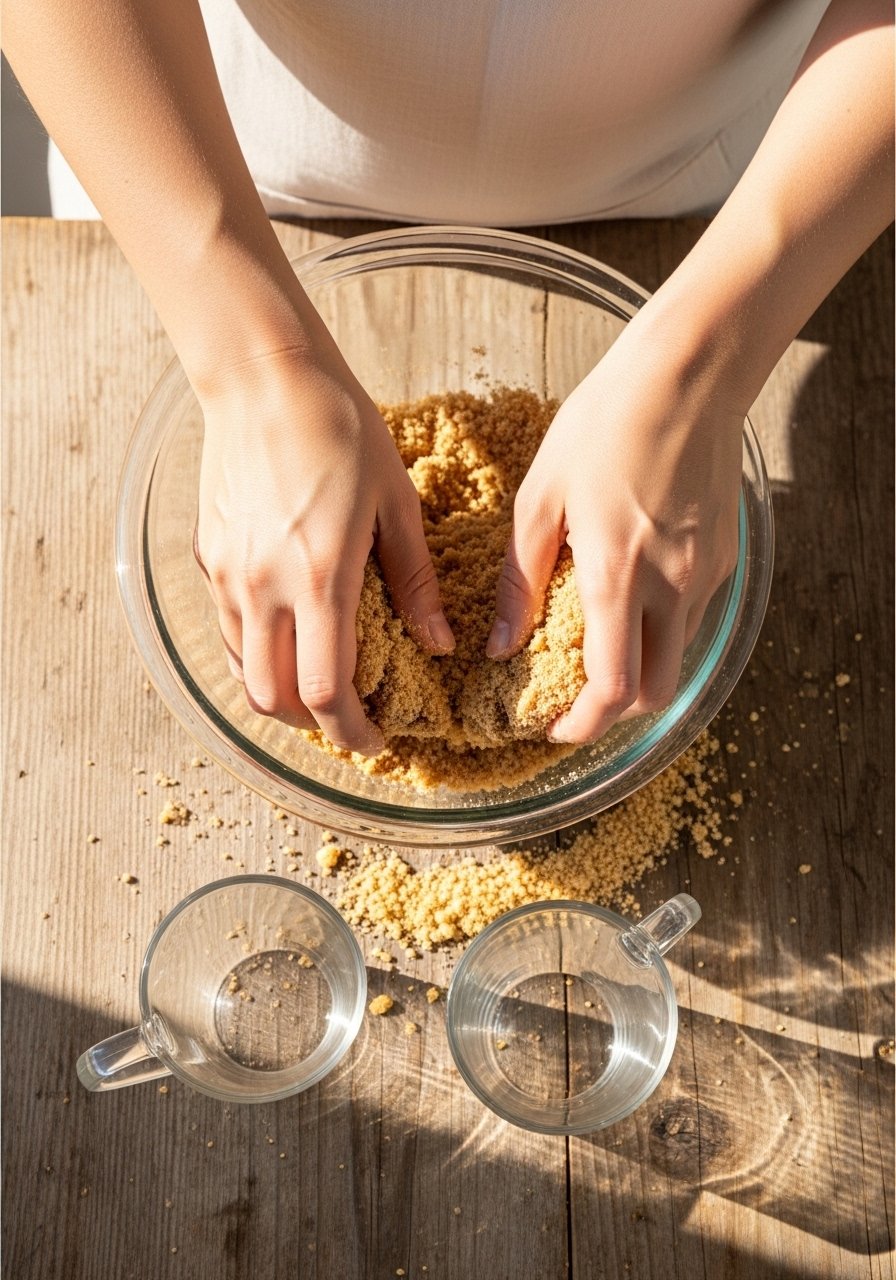
1. Prepare the Cookie Base
Start by mixing your graham cracker crumbs with melted butter in a bowl. Stir until it looks like wet sand—this ensures the base holds together without baking.
Press about 2 tablespoons into the bottom of each clear glass cup using a spoon or small glass. This creates a firm foundation that won't crumble when you dig in. Chill the cups for 10 minutes to set; it helps the layers stay distinct.
2. Whip Up the Creamy Filling
In a large bowl, beat softened cream cheese and sifted powdered sugar until smooth, about 2 minutes with an electric mixer. No lumps mean silky texture.
Add cold heavy cream and vanilla, then whip on high for 3-4 minutes until stiff peaks form. Taste and adjust sweetness if needed—this filling is the star, light like mousse but rich.
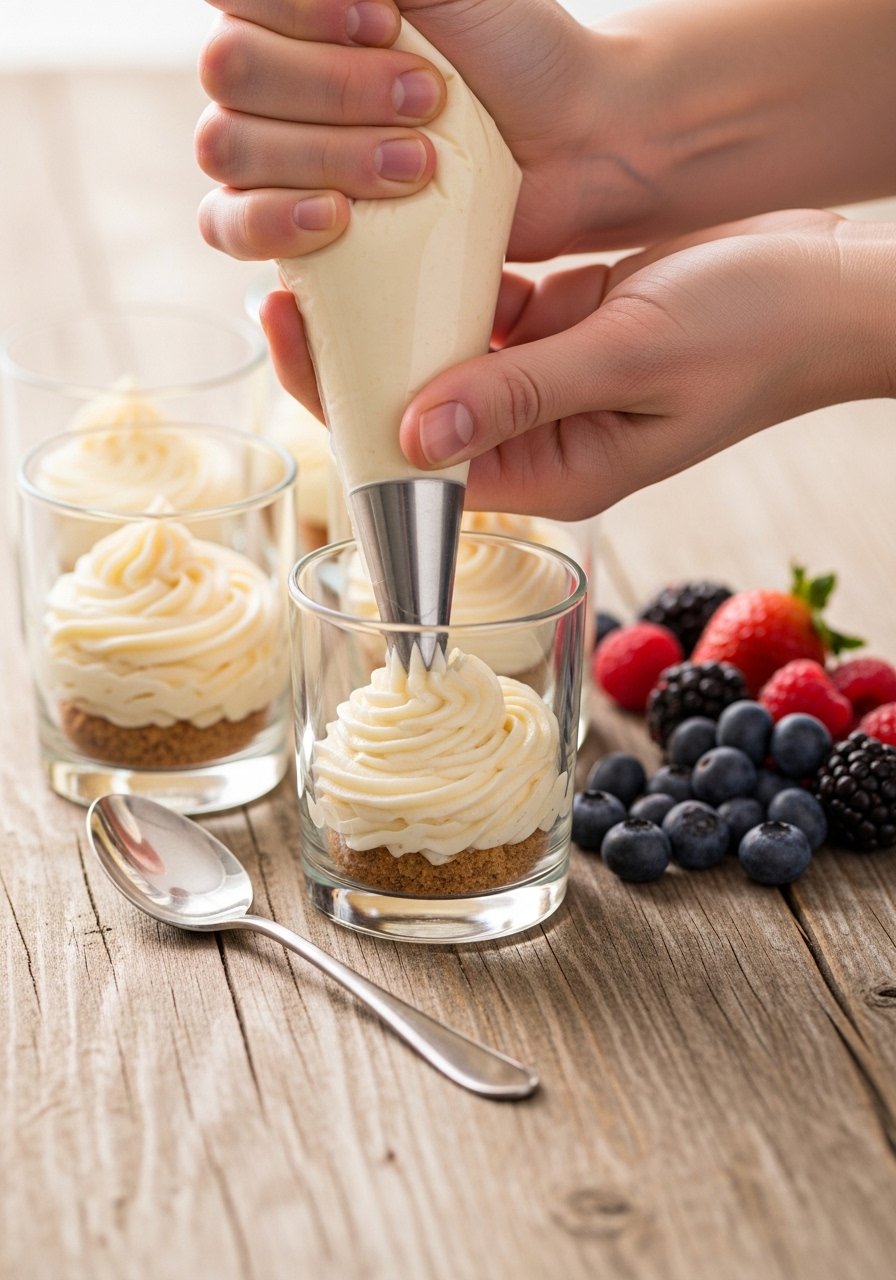
3. Layer the Filling
Spoon or pipe half the filling into each cup over the chilled base. Use a piping bag for neat swirls if you want that pro look, or just dollop for rustic charm.
Smooth the top gently with a spoon. This middle layer adds height and that irresistible creaminess everyone loves.
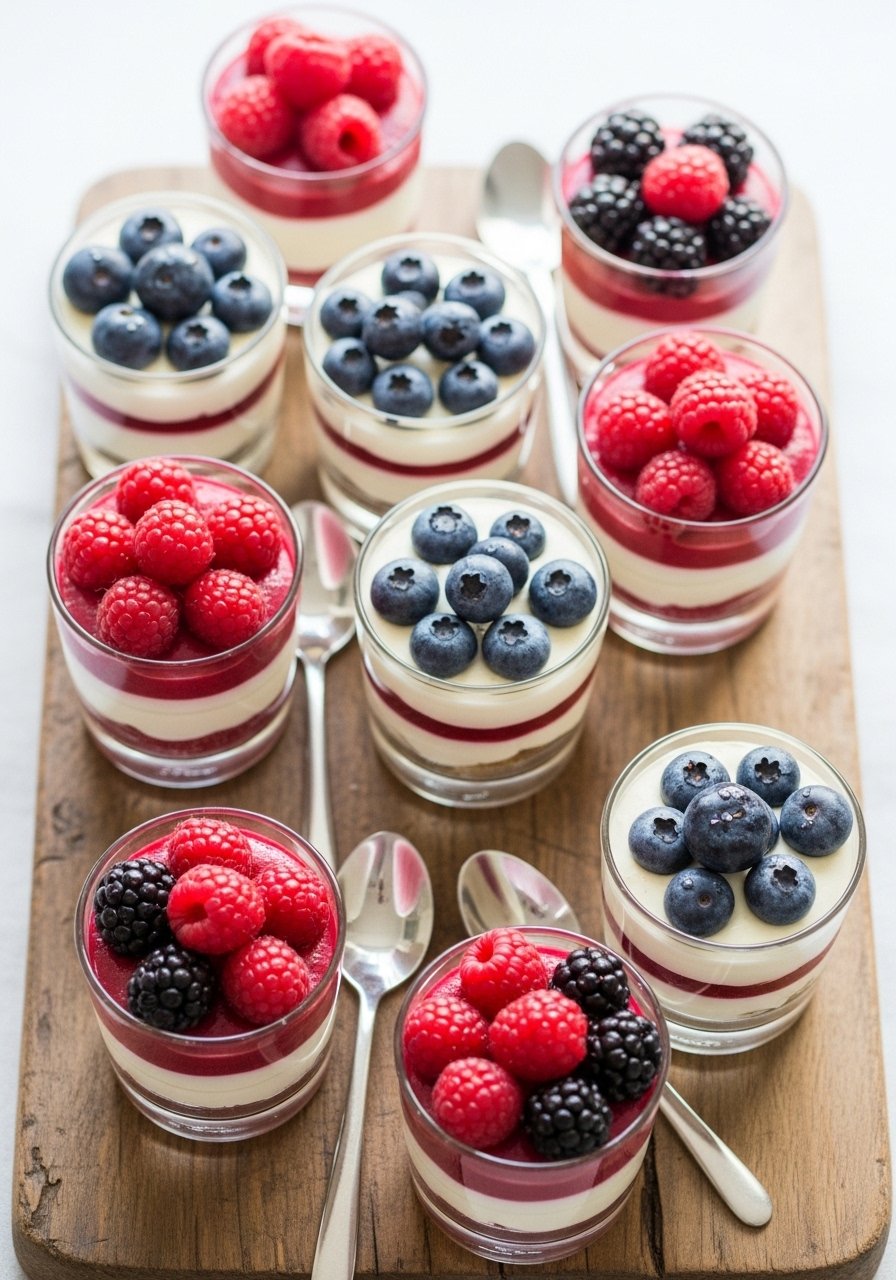
4. Add the Topping and Chill
Scatter fresh berries on top, pressing lightly. Drizzle chocolate if using—it contrasts beautifully with the berries.
Cover loosely and refrigerate for at least 20 minutes. Chilling firms everything up, blending flavors without sogginess. Total time: under 30 minutes active.
Tips for Perfect Layers
Layering is key to these no-bake mini dessert cups—rushed assembly leads to mush.
First, always chill between layers. The cold base grips the filling, preventing slides.
Use straight-sided clear cups (4-6 oz) for visibility. Pipe filling for even distribution; it saves time and looks polished.
Pro Tip: Freeze berries briefly to keep them perky on top.
Common Mistakes to Avoid
Beginners often skip sifting powdered sugar, causing gritty filling. Always sift for that pro smoothness.
Don't overmix the base—it gets tough. Stir just until combined.
Another Pitfall: Room-temp cream cheese is essential; cold chunks ruin the whip.
Skip the fridge step? Layers blend into mush. Patience pays off here.
Make-Ahead and Storage
These cups shine made ahead—prep up to 24 hours early.
Assemble bases and filling separately; layer just before serving or chill fully covered.
Store in fridge up to 2 days; berries stay fresh if not overripe. Freeze bases alone for longer.
Serving Note: Let sit 5 minutes at room temp for peak creaminess.
Final Thoughts
You've nailed these no-bake mini dessert cups—simple steps, stunning results.
Grab your cups and get layering; they're foolproof for any occasion.
Enjoy the smiles they bring.