Craving that perfect scoop of ice cream but worried about gluten? You've got this. Homemade gluten free ice cream is creamy, dreamy, and naturally simple—no fancy machines needed.
We'll walk you through a no-churn vanilla version that's rich and scoopable. Say goodbye to store-bought doubts and hello to your new summer staple.
It's beginner-proof and ready in minutes of hands-on time.
How To Make Gluten Free Ice Cream
This guide delivers ultra-creamy, vanilla-forward gluten free ice cream with a velvety texture that rivals the best shops. No gritty aftertaste, just pure indulgence that freezes firm yet softens perfectly for scooping.
Ingredients
- 2 cups heavy whipping cream, chilled for best volume (full-fat for richness)
- 1 (14-ounce) can sweetened condensed milk, ensures sweetness and creaminess without added gluten
- 2 teaspoons pure vanilla extract, for classic flavor—use gluten-free certified if needed
- Pinch of sea salt, balances sweetness and enhances taste
Step-By-Step Instructions
1. Chill Your Tools and Ingredients
Start by placing a large mixing bowl and your beaters in the freezer for 15 minutes. Cold equipment whips cream faster and higher, preventing it from turning into butter.
Measure out the heavy cream into a small pitcher and pop it in the fridge too. This step sets you up for fluffy results in your gluten free ice cream—no flat scoops here.
Visual cue: Everything feels icy to the touch.
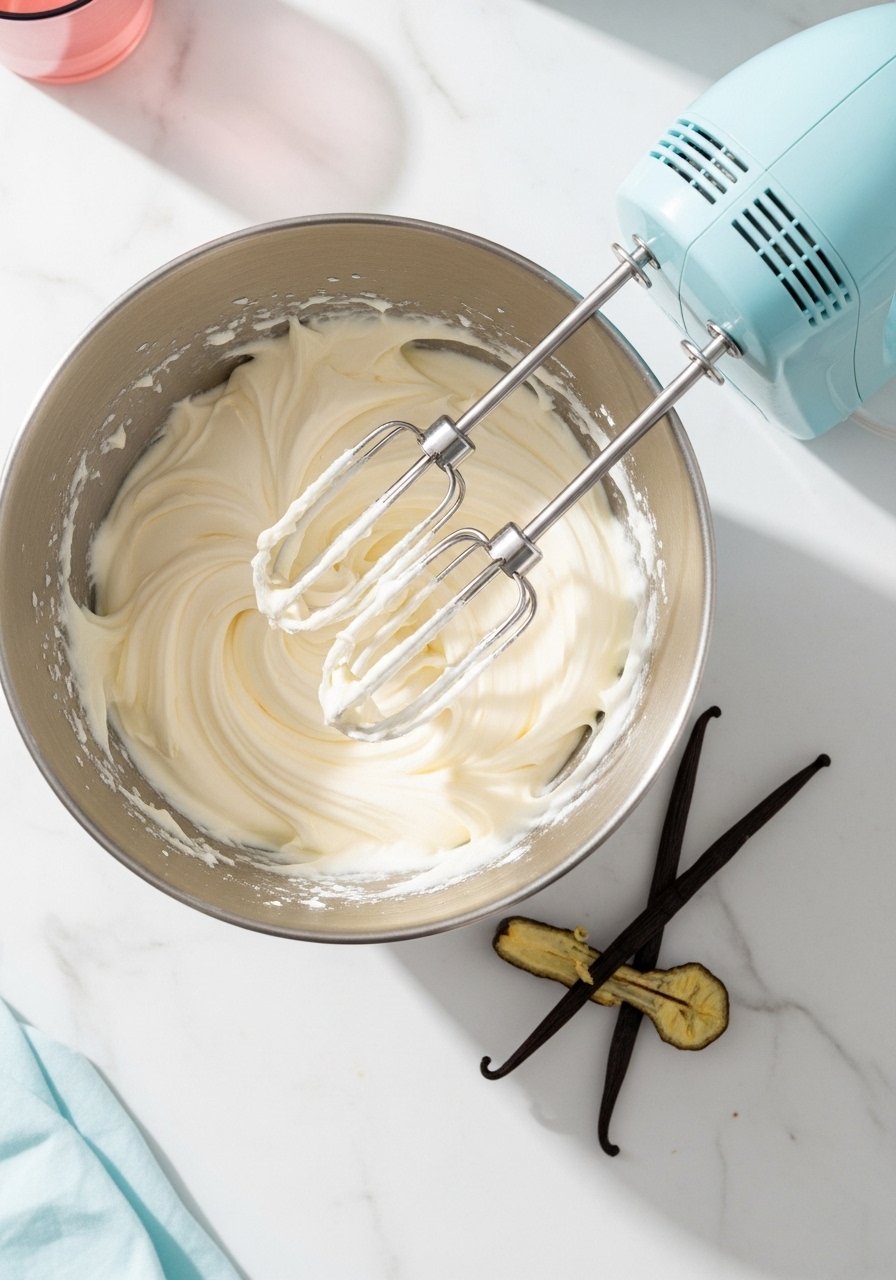
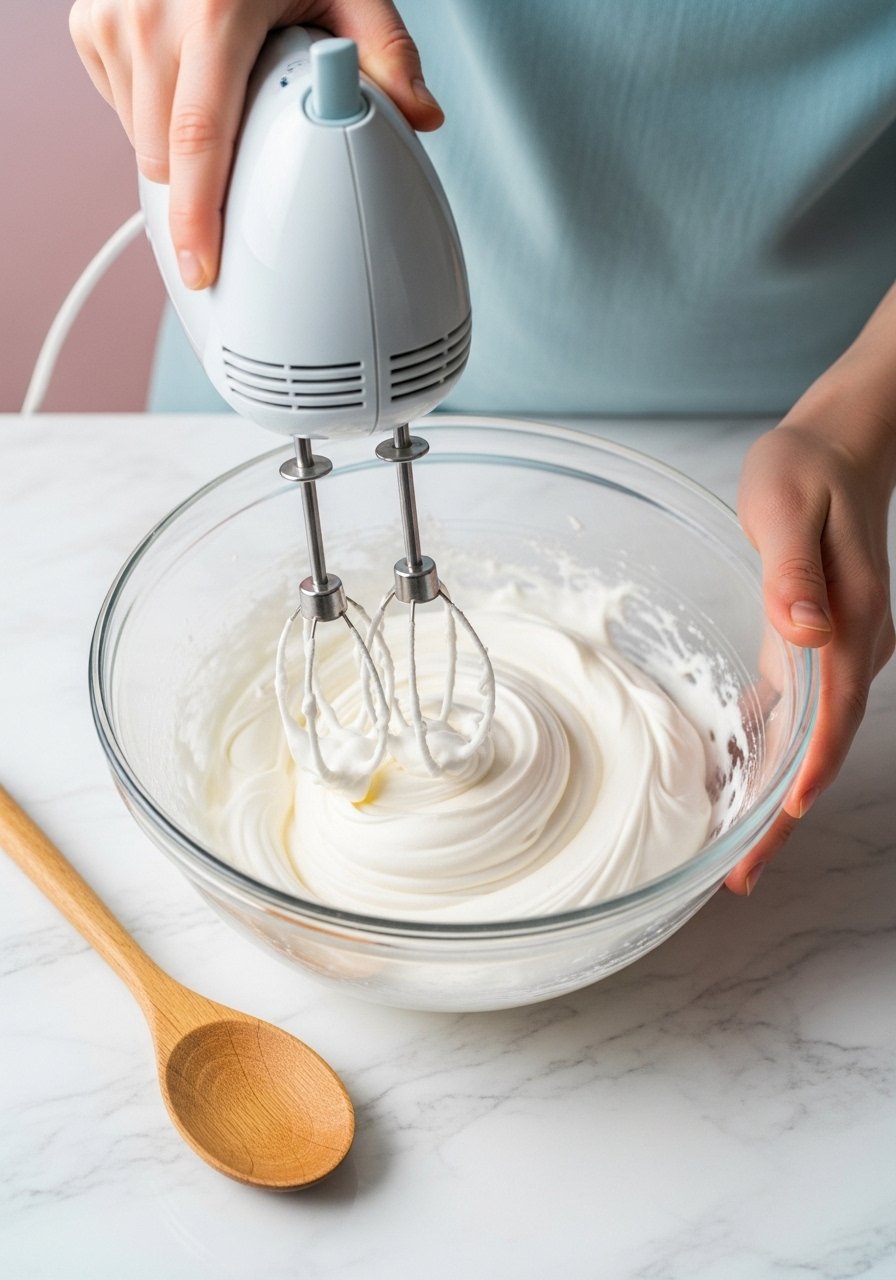
2. Whip the Cream to Perfection
Pour the chilled heavy cream into your frozen bowl. Using an electric mixer on medium-high speed, beat for 2-3 minutes until stiff peaks form—lift the beaters, and peaks should hold shape without flopping.
Overbeating deflates it, so watch closely; it doubles in volume quickly. This airy base is the secret to light, creamy gluten free ice cream texture.
Taste test: It should be subtly sweet from the cream alone.
3. Mix the Condensed Milk Base
In a separate medium bowl, whisk together the sweetened condensed milk, vanilla extract, and sea salt until smooth—about 1 minute. No lumps means even freezing.
This sticky mixture provides sweetness and structure without needing eggs or cooking, keeping it simple and naturally gluten free.
Pro tip: Scrape the can clean for every drop of flavor.
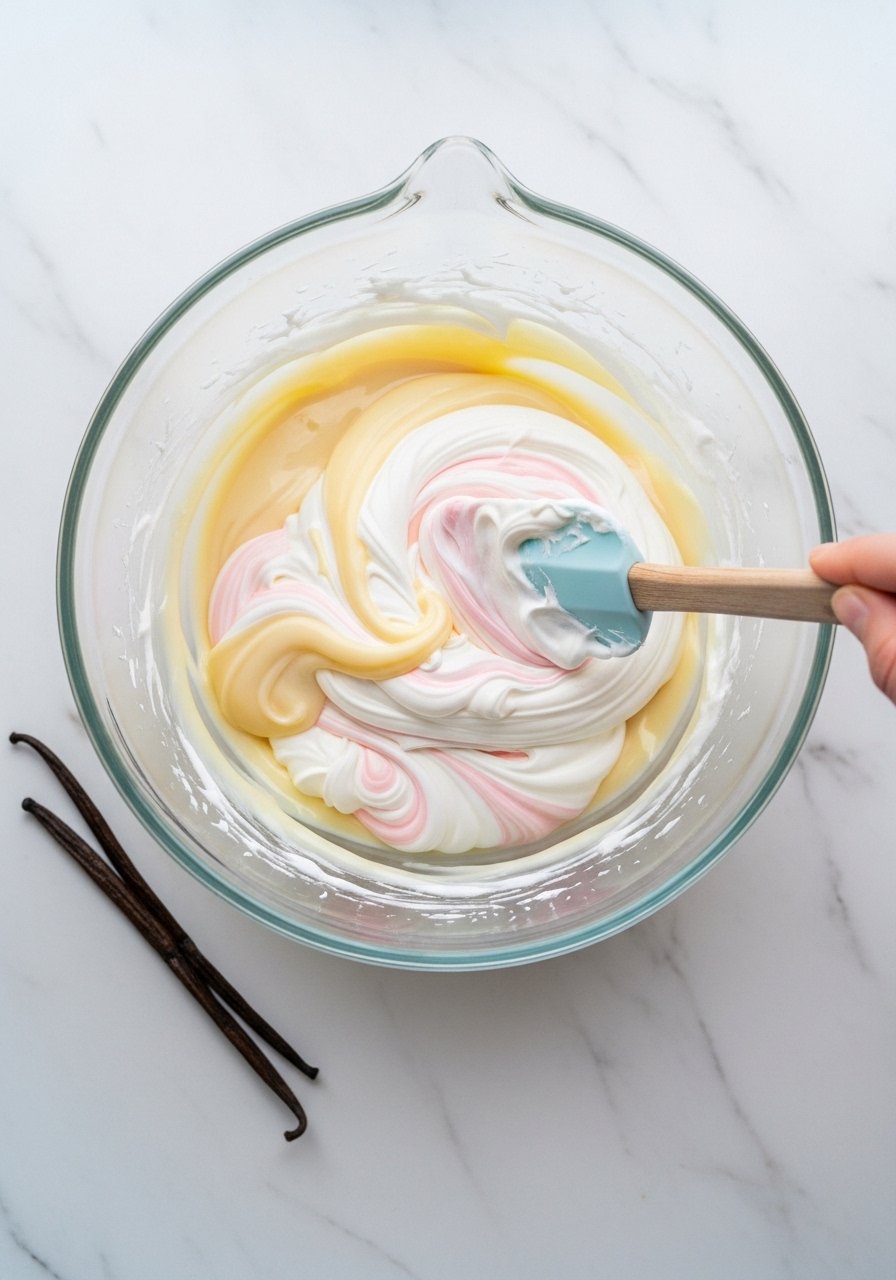
4. Fold Everything Together Gently
Spoon the condensed milk mixture over the whipped cream. Using a rubber spatula, fold gently in wide strokes—turn the bowl and fold until just combined, about 1-2 minutes.
Folding preserves air bubbles for scoopable softness later. Streaks are okay; overmixing leads to dense ice cream.
It'll look like thick, glossy mousse—your gluten free ice cream batter is ready.
5. Freeze for Scoopable Bliss
Pour into a freezer-safe loaf pan or airtight container. Smooth the top, cover tightly with plastic wrap pressed against the surface to prevent ice crystals, then lid it.
Freeze for at least 6 hours, ideally overnight. At 0°F (-18°C), it firms up perfectly. First scoop test: It should hold shape but soften in seconds.
Tips for the Creamiest Gluten Free Ice Cream
Chill everything religiously—cream, bowl, even the condensed milk can briefly in the fridge. Warmer ingredients collapse the whip, ruining texture.
Use full-fat heavy cream (at least 36% fat); low-fat versions won't peak properly and taste icy.
Fold, don't stir—gentle motion keeps it light. If it deflates, you've overmixed; start lighter next time.
Freeze covered directly: Exposed surfaces crystalize from freezer air, making it grainy.
Gluten-Free Flavor Boosters
Stick to naturally gluten-free add-ins like pure fruit purees—blend ripe strawberries for pink swirls added post-fold.
Cocoa powder (1/4 cup sifted) mixes into the base for chocolate; check labels for certified gluten-free.
Infuse vanilla with fresh pods or try almond extract sparingly—1 tsp max—for nutty depth without nuts.
Swirl in 1/2 cup peanut butter post-fold; it stays creamy and scoopable.
Storing and Serving Your Ice Cream
Transfer to an airtight container right away—prevents odor absorption from your freezer.
It keeps perfectly for 2 weeks; portion into smaller tubs for quicker softening. Let sit 5-10 minutes at room temp before scooping.
Serve in chilled bowls with fresh fruit—warmth melts it too fast, but cold keeps that ideal bite.
Avoid refreezing soft scoops; it alters texture permanently.
Troubleshooting Gluten Free Ice Cream Woes
Too Icy? Your cream wasn't cold enough or surface wasn't covered—crystals formed. Next batch, press plastic wrap down fully.
Not Sweet Enough? Taste the base before freezing; add 1 tbsp more condensed milk if needed, but sparingly.
Grainy Texture? Overwhipped cream or rushed folding—beat to soft peaks first time around.
Won't Scoop? Let it thaw 10 minutes; banging the container on the counter releases air pockets gently.
Final Thoughts
You've nailed homemade gluten free ice cream—creamy, worry-free, and all yours.
Trust the chill and fold; it'll scoop like a dream every time.
Dig in confidently; your kitchen just got cooler.