Got a can of thawed frozen cherry pie filling in your pantry? You're in for a treat! These recipes turn that sweet-tart gem into showstoppers without the fuss of pitting fresh cherries. From cozy cobblers to no-bake delights, you'll whip up desserts that wow.
Whether you're feeding a crowd or craving a quick sweet fix, these 12 ideas use simple ingredients you likely have on hand. Dive in and let the cherries shine.
12 Thawed Frozen Cherry Pie Filling Recipes
Ready to get baking? Each recipe starts with one 21-ounce can of thawed frozen cherry pie filling, making them easy and foolproof. Pick your favorite and enjoy the juicy results.
1. Classic Cherry Cobbler
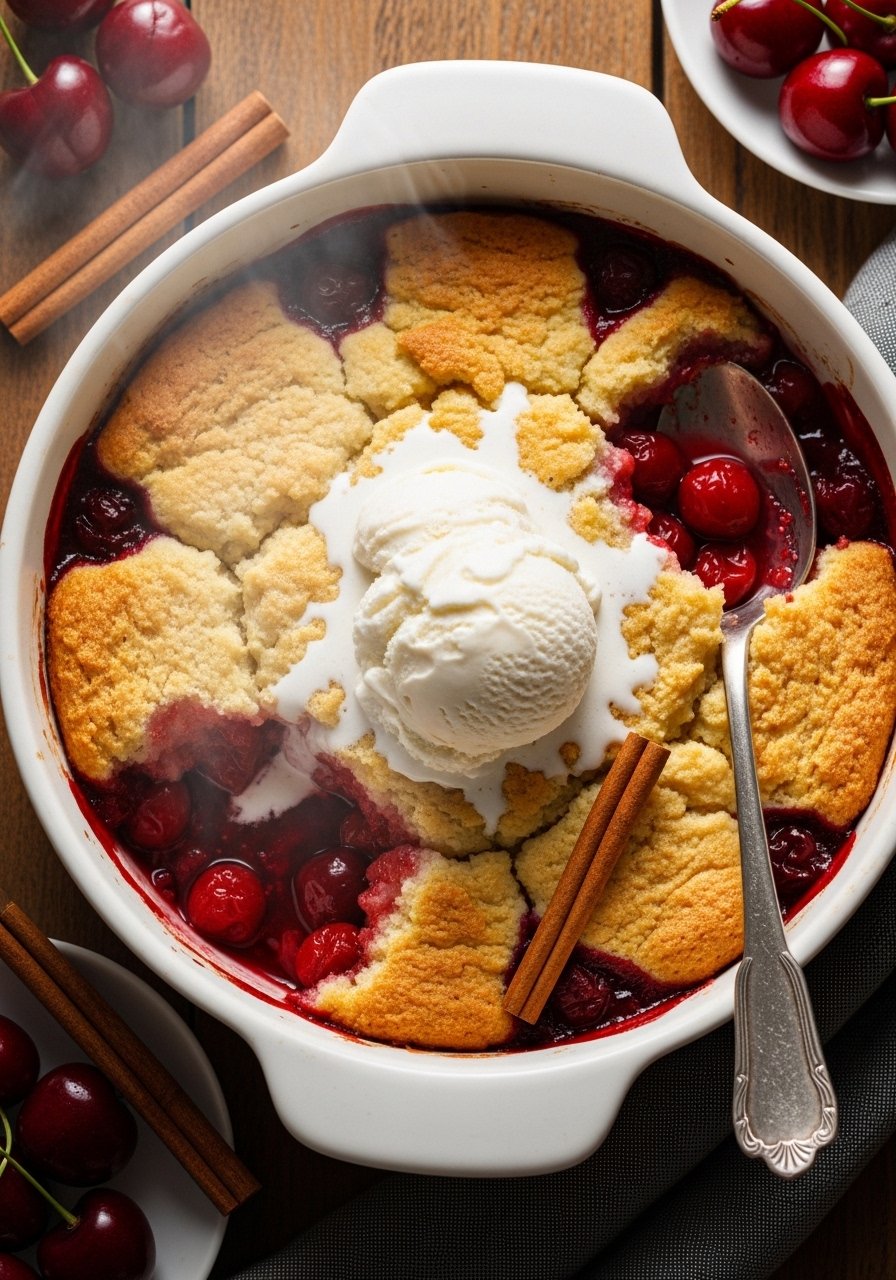
This warm cobbler delivers buttery biscuits over juicy cherries, perfect for cozy nights. The filling's tart sweetness bubbles up, creating a soft, cake-like texture that pairs beautifully with ice cream.
Ingredients
- 1 (21-ounce) can thawed frozen cherry pie filling
- 1 cup all-purpose flour
- 1/4 cup granulated sugar
- 1 teaspoon baking powder
- 1/2 teaspoon salt
- 6 tablespoons cold unsalted butter, cubed
- 1/2 cup milk
- Vanilla ice cream, for serving
Step-by-Step Instructions
-
Preheat and Prep Pan
Preheat oven to 375°F (190°C). Grease an 8×8-inch baking dish. Pour thawed cherry pie filling into the dish and spread evenly. -
Mix Dry Ingredients
In a bowl, whisk flour, sugar, baking powder, and salt. Cut in butter with a pastry blender until crumbly, like coarse peas. -
Add Liquid and Top
Stir in milk until just combined—dough will be thick. Drop spoonfuls over cherries, leaving gaps for bubbling. -
Bake to Golden
Bake 30-35 minutes until topping is golden and cherries bubble. Cool 10 minutes. Serve warm with ice cream.
2. Easy Cherry Dump Cake

Dump cake is your lazy-day hero: layers of cherries, cake mix, and butter melt into a gooey, caramelized treat with zero mixing. Irresistible texture and effortless appeal.
Ingredients
- 1 (21-ounce) can thawed frozen cherry pie filling
- 1 box yellow cake mix (about 15 ounces)
- 1/2 cup unsalted butter, sliced thin
- 1/2 cup chopped pecans (optional)
- Whipped cream, for topping
Step-by-Step Instructions
-
Preheat Oven
Preheat to 350°F (175°C). Dump thawed cherry filling into a greased 9×13-inch pan. -
Layer Cake Mix
Sprinkle dry cake mix evenly over cherries. Do not stir. -
Add Butter Topping
Dot with thin butter slices, covering fully. Sprinkle pecans if using. -
Bake Until Crispy
Bake 40-45 minutes until top is golden and edges bubble. Cool slightly, serve with whipped cream.
3. Almond Cherry Crisp
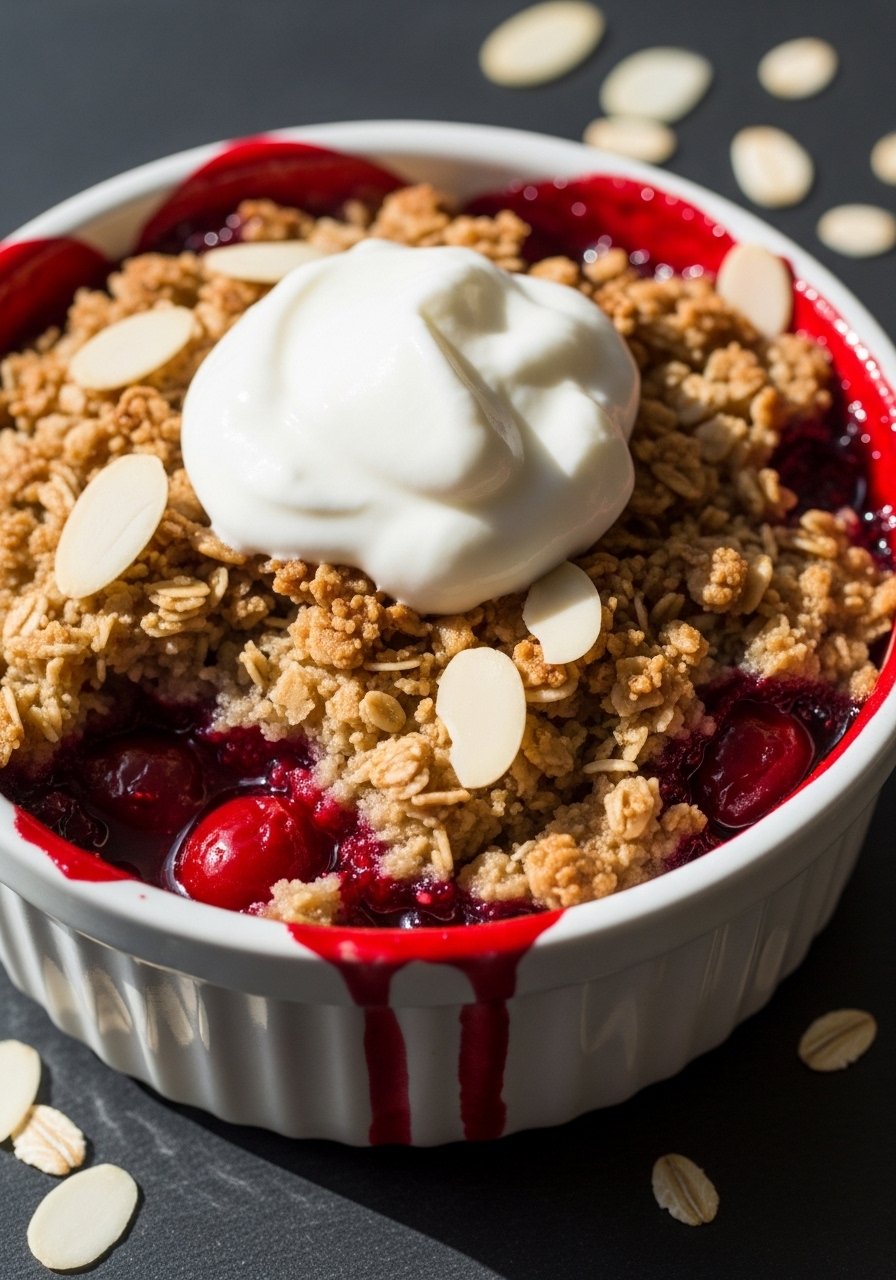
Crispy oats and almonds crown tart cherries for a crunchy contrast to the soft filling. Nutty flavor elevates this crisp into a sophisticated yet simple dessert.
Ingredients
- 1 (21-ounce) can thawed frozen cherry pie filling
- 1 cup old-fashioned oats
- 1/2 cup all-purpose flour
- 1/2 cup brown sugar
- 1/2 cup sliced almonds
- 1/2 teaspoon cinnamon
- 1/2 cup melted unsalted butter
Step-by-Step Instructions
-
Preheat and Fill
Heat oven to 375°F (190°C). Spoon thawed filling into 6 ramekins or one 8×8 dish. -
Mix Topping
Combine oats, flour, sugar, almonds, and cinnamon in a bowl. Stir in melted butter until crumbly. -
Top and Bake
Sprinkle evenly over cherries. Bake 25-30 minutes until topping is browned and crisp. -
Rest and Serve
Let cool 5 minutes for cherries to set. Enjoy warm.
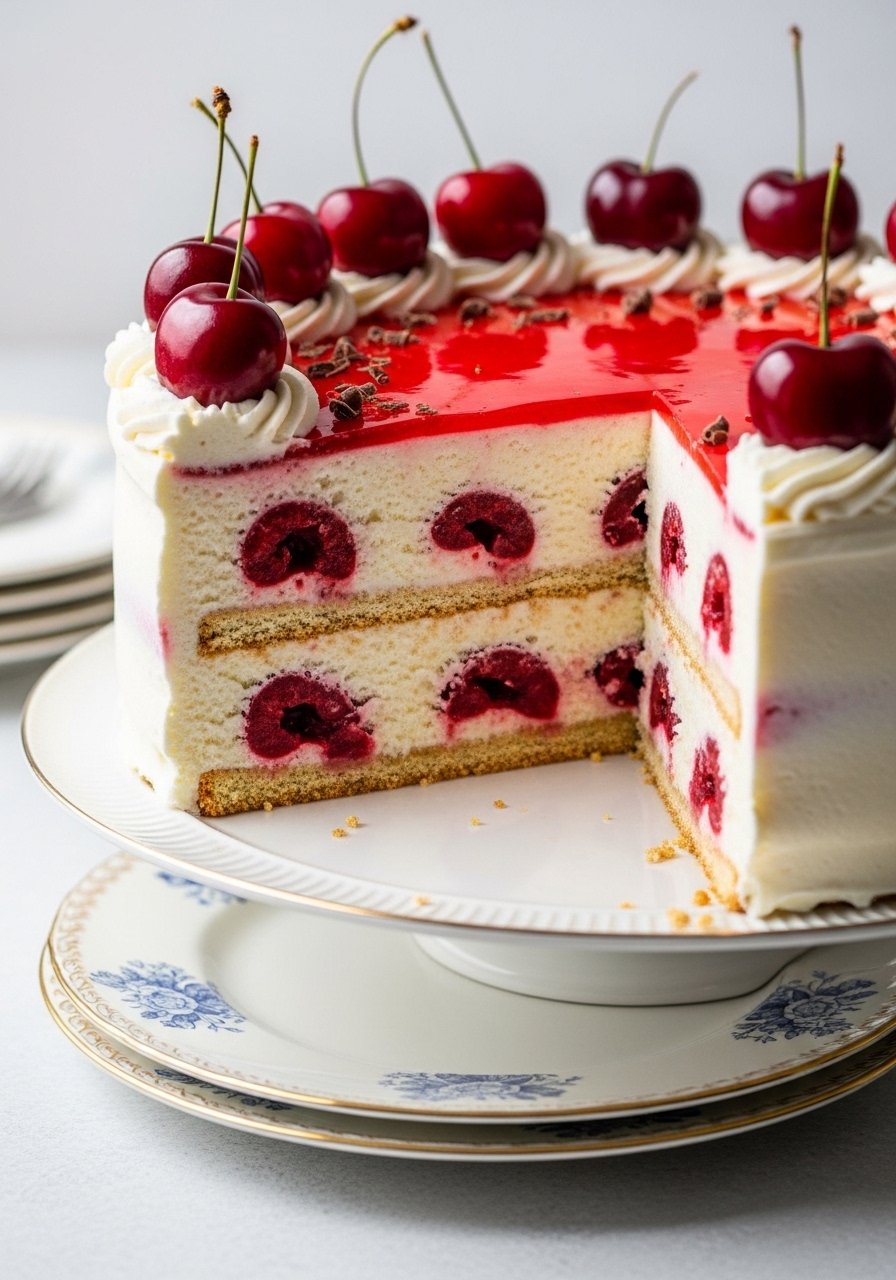
4. No-Bake Cherry Cheesecake
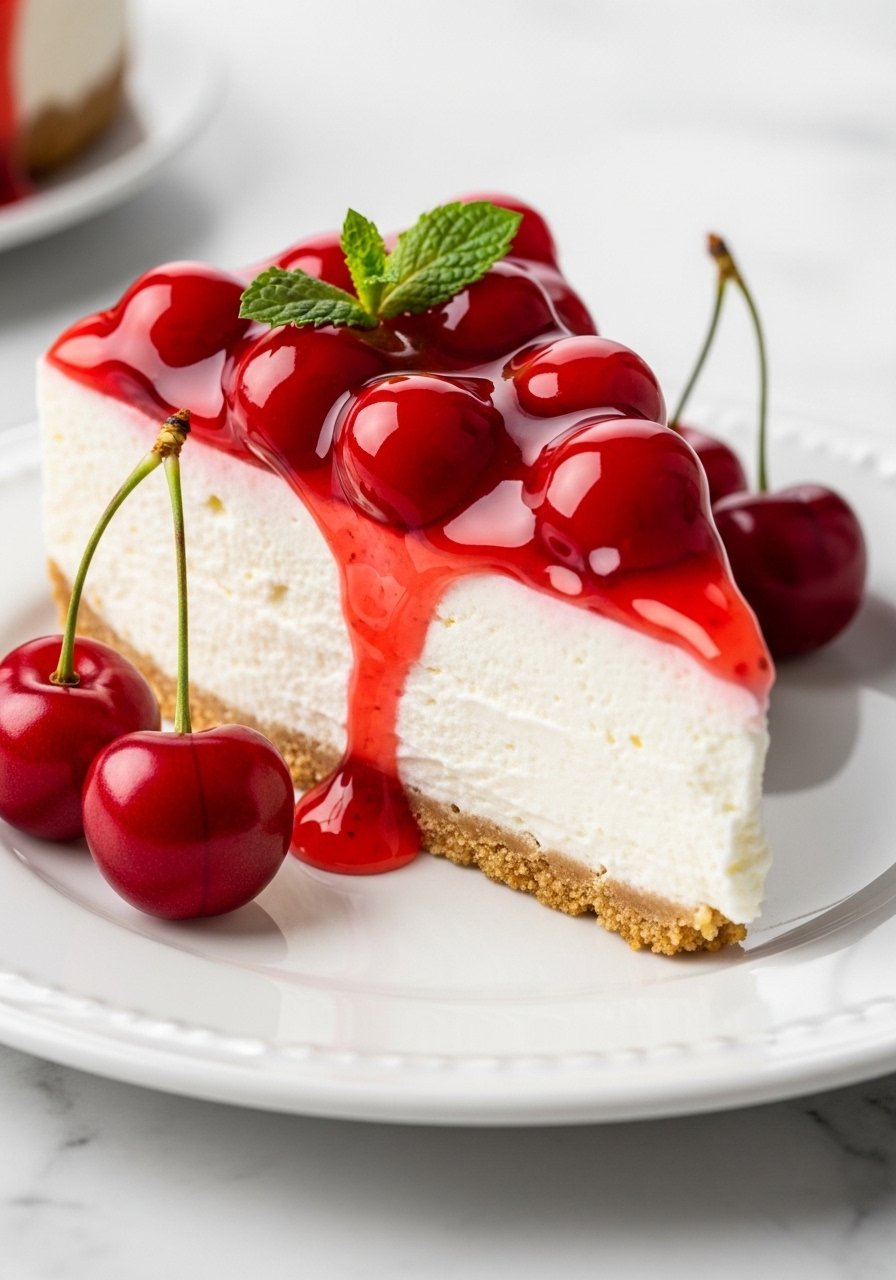
Creamy cheesecake meets vibrant cherries in this chill-and-serve wonder. Smooth, rich texture with no oven needed—pure indulgence for hot days.
Ingredients
- 1 (21-ounce) can thawed frozen cherry pie filling
- 2 cups graham cracker crumbs
- 1/2 cup melted butter
- 16 ounces cream cheese, softened
- 1 cup powdered sugar
- 1 teaspoon vanilla extract
- 2 cups whipped topping (thawed)
Step-by-Step Instructions
-
Make Crust
Mix crumbs and melted butter. Press into 9-inch springform pan bottom. Chill 15 minutes. -
Beat Filling
Beat cream cheese, powdered sugar, and vanilla until smooth. Fold in whipped topping. -
Assemble Layers
Spread cheesecake over crust. Spoon cherries on top. Chill 4 hours or overnight. -
Slice and Serve
Run knife around edge, release pan. Slice cleanly.
5. Cherry Cheesecake Bars
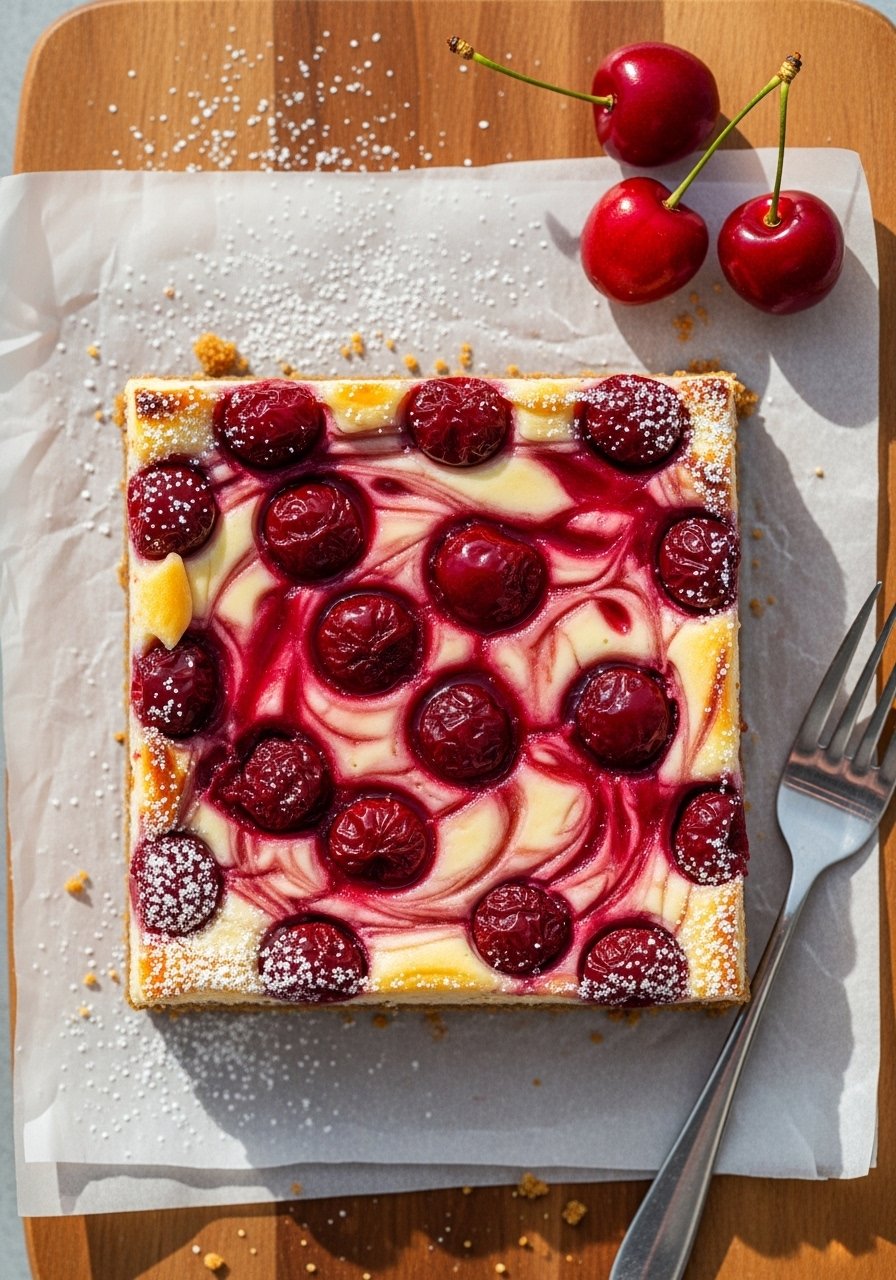
Portable bars with a buttery base, tangy cheesecake, and cherry crown. The perfect bite-sized treat with layered flavors and fudgy texture.
Ingredients
- 1 (21-ounce) can thawed frozen cherry pie filling
- 1 1/2 cups graham cracker crumbs
- 1/3 cup melted butter
- 16 ounces cream cheese, softened
- 3/4 cup sugar
- 2 eggs
- 1 teaspoon vanilla
Step-by-Step Instructions
-
Preheat and Crust
Preheat to 350°F (175°C). Mix crumbs and butter; press into 9×13 pan. Bake 10 minutes, cool. -
Mix Cheesecake
Beat cream cheese, sugar, eggs, and vanilla until creamy. -
Bake Base
Pour over crust. Bake 25-30 minutes until center is set. Cool completely. -
Top and Chill
Spread cherries over. Refrigerate 2 hours. Cut into bars.
6. Chocolate Cherry Brownies
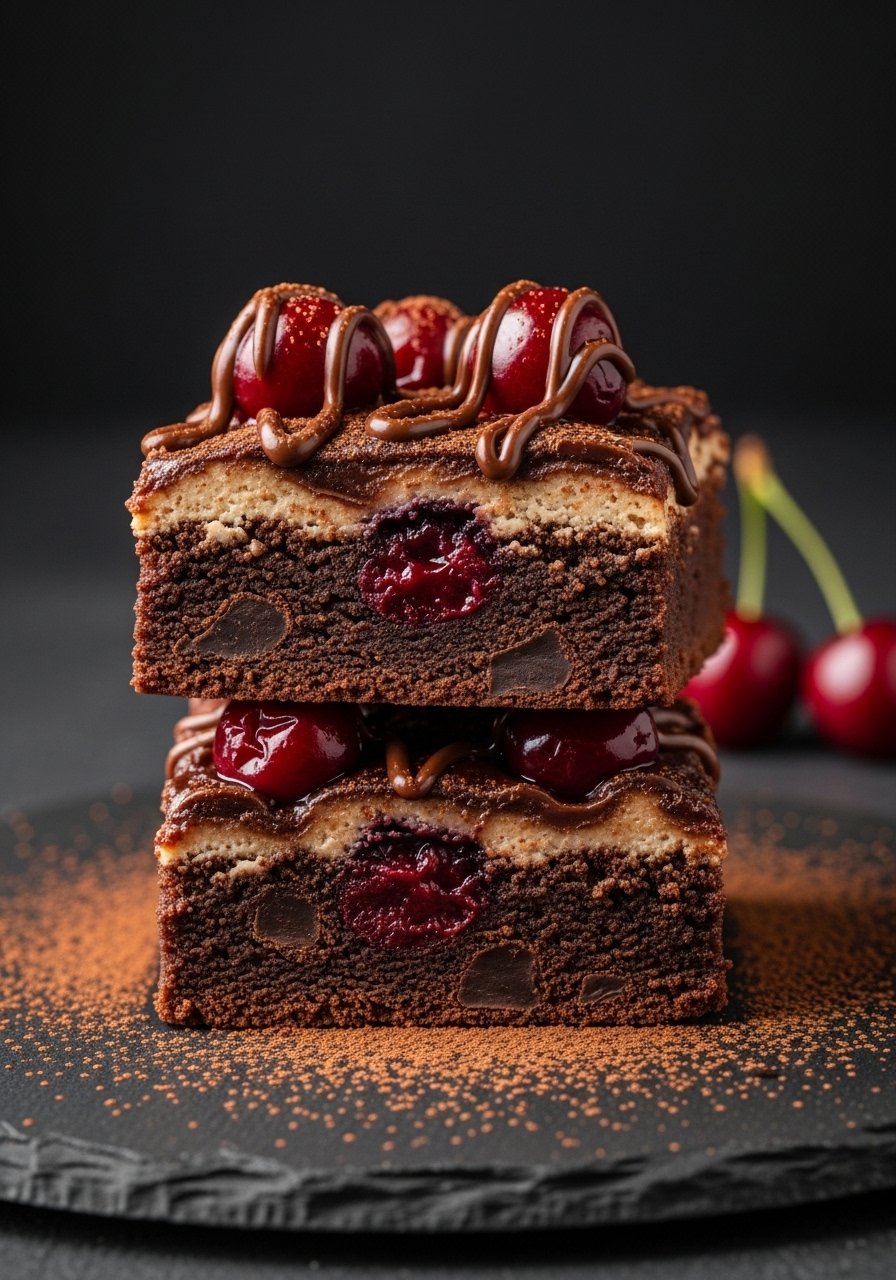
Fudgy brownies studded with cherries for a black forest vibe. Gooey centers and fruity bursts make these irresistibly decadent.
Ingredients
- 1 (21-ounce) can thawed frozen cherry pie filling (divided)
- 1 box brownie mix (about 18 ounces)
- 1/2 cup vegetable oil
- 2 eggs
- 1/2 cup chocolate chips
- 1/4 cup chopped dark chocolate
Step-by-Step Instructions
-
Preheat Oven
Heat to 350°F (175°C). Grease 9×13 pan. -
Mix Batter
Combine brownie mix, oil, eggs, and half the cherry filling. Fold in chips and chocolate. -
Spread and Swirl
Pour into pan. Dollop remaining cherries on top; swirl lightly with knife. -
Bake to Fudgy
Bake 25-30 minutes until edges pull away. Cool, cut into squares.
7. Flaky Cherry Turnovers
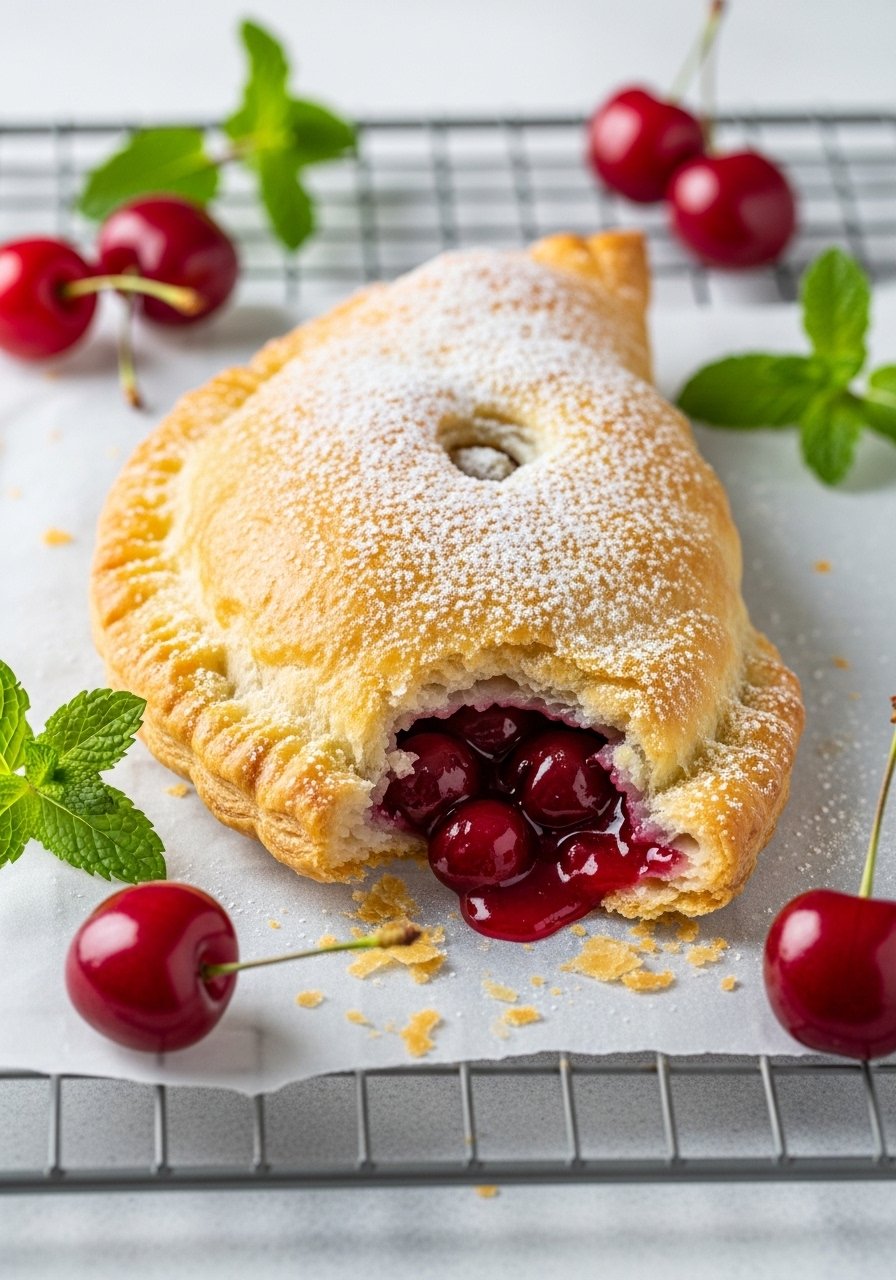
Puff pastry pockets burst with cherries—flaky, handheld bliss. Crispy outside, warm juicy inside for snack or dessert.
Ingredients
- 1 (21-ounce) can thawed frozen cherry pie filling
- 1 sheet puff pastry, thawed
- 1 egg, beaten
- 2 tablespoons sugar
- Powdered sugar, for dusting
Step-by-Step Instructions
-
Preheat and Prep
Preheat to 400°F (200°C). Unfold puff pastry on floured surface; cut into 8 squares. -
Fill Squares
Spoon 2 tablespoons cherries onto each square center. -
Fold and Seal
Fold diagonally to triangles; crimp edges with fork. Brush with egg, sprinkle sugar. -
Bake Golden
Bake on parchment-lined sheet 15-20 minutes until puffed and brown. Dust with powdered sugar.
8. Mini Cherry Hand Pies
Adorable pie bites with buttery crust and full cherry flavor. Portable and party-ready with perfect crust-to-filling ratio.
Ingredients
- 1 (21-ounce) can thawed frozen cherry pie filling
- 2 refrigerated pie crusts
- 1 egg, beaten
- 2 tablespoons coarse sugar
- 1 tablespoon milk
Step-by-Step Instructions
-
Preheat Oven
Heat to 375°F (190°C). Unroll pie crusts; cut into 12 circles (3-4 inches each) using biscuit cutter. -
Fill Crusts
Spoon 1 tablespoon cherries onto half of each circle. -
Seal Pies
Fold over, crimp edges. Cut slits. Brush with egg-milk mix; sprinkle sugar. -
Bake Until Crisp
Bake on lined sheet 20-25 minutes. Cool on rack.
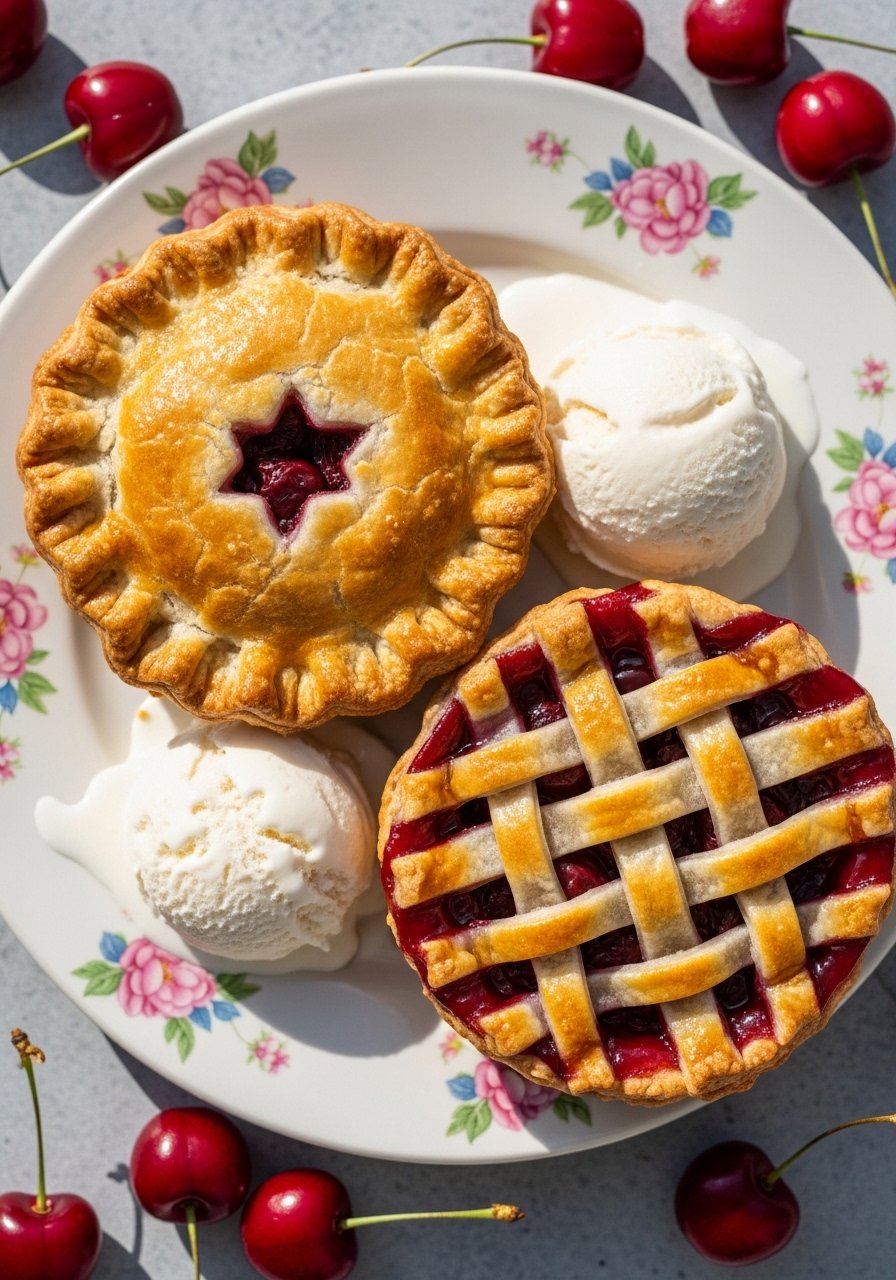
9. Rustic Cherry Galette
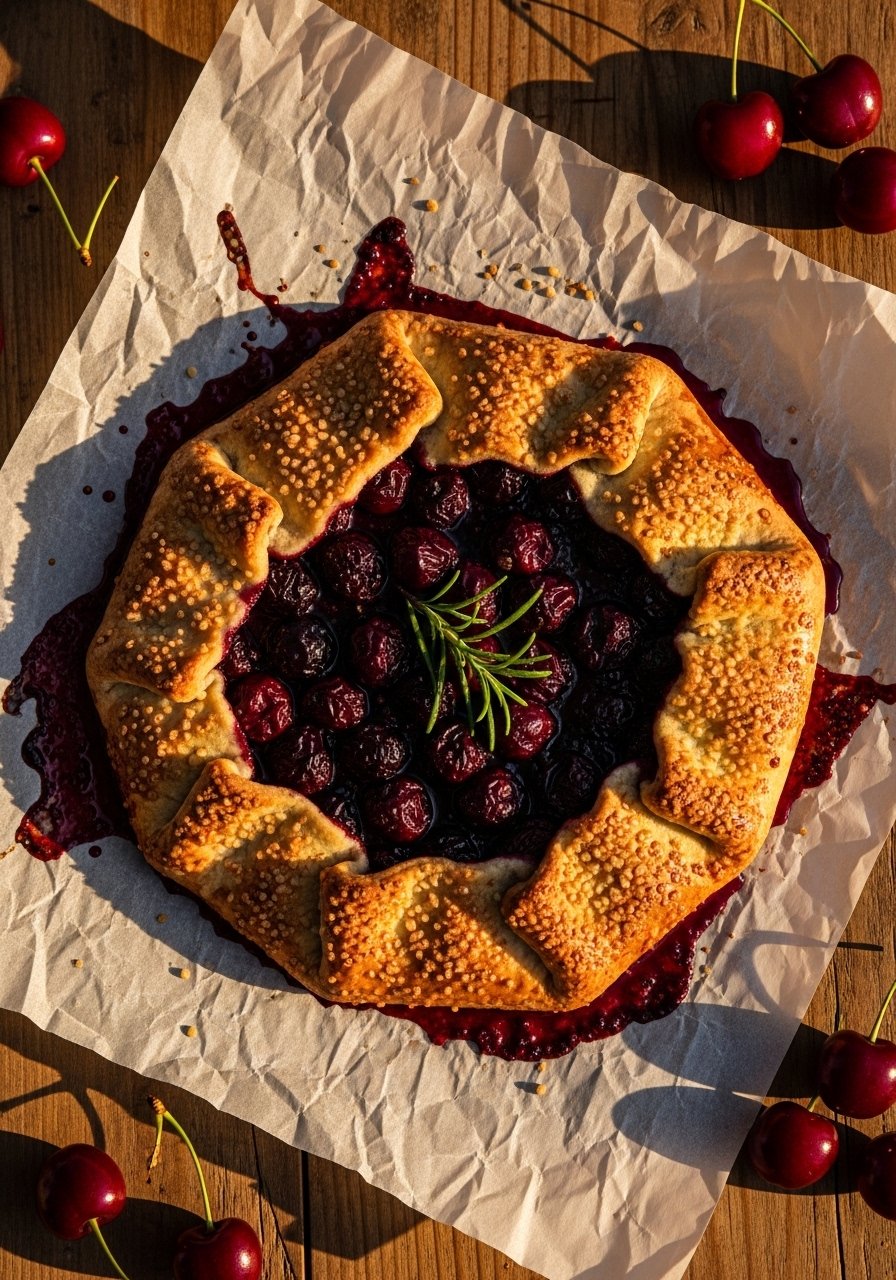
Rustic galette boasts flaky edges hugging cherries. Free-form elegance with caramelized fruit and tender pastry.
Ingredients
- 1 (21-ounce) can thawed frozen cherry pie filling
- 1 refrigerated pie crust
- 1 tablespoon cornstarch (mixed with filling if too thin)
- 1 egg, beaten
- 2 tablespoons turbinado sugar
Step-by-Step Instructions
-
Preheat and Prep
Preheat to 400°F (200°C). Unroll crust on parchment-lined baking sheet. -
Fill Center
Stir cornstarch into cherries if needed. Mound in center, leaving 2-inch border. -
Fold Crust
Fold edges over filling, pleating. Brush with egg; sprinkle sugar. -
Bake Rustic
Bake 30-35 minutes until crust is deep golden. Cool before slicing.
10. Cherry Yogurt Parfaits
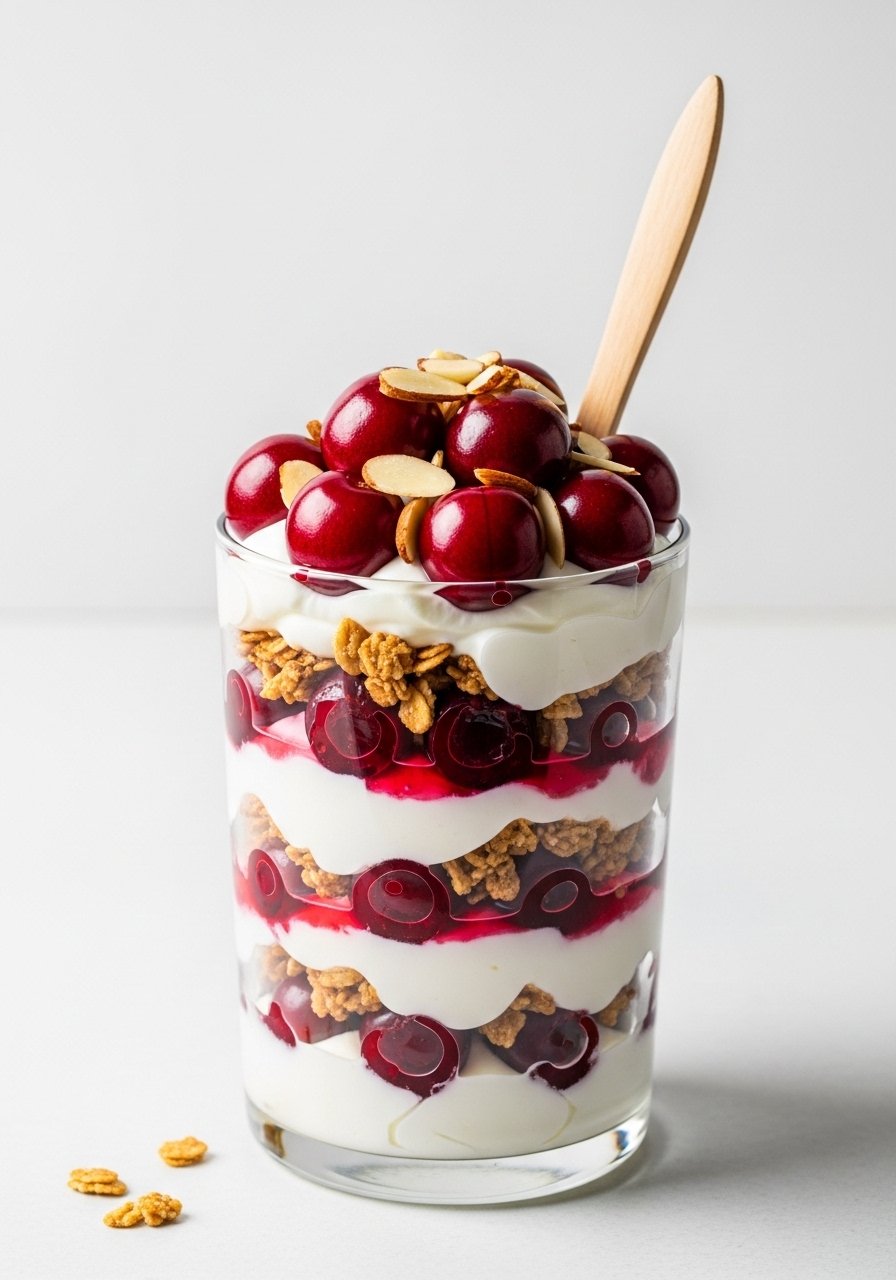
Layered yogurt, cherries, and granola for a healthy-ish treat. Creamy, crunchy, and refreshing—breakfast or snack.
Ingredients
- 1 (21-ounce) can thawed frozen cherry pie filling
- 2 cups Greek yogurt
- 1 cup granola
- 1/4 cup honey
- Sliced almonds, for topping
Step-by-Step Instructions
-
Prep Layers
In glasses, spoon 2 tablespoons cherries. -
Add Yogurt
Layer 1/4 cup yogurt, drizzle honey. -
Crunch with Granola
Sprinkle granola, repeat layers ending with cherries. -
Top and Chill
Add almonds. Chill 30 minutes or serve immediately.
11. Cherry Icebox Cake
No-bake cake with cream, grahams, and cherries sets in fridge. Soft, mousse-like with cookie crunch.
Ingredients
- 1 (21-ounce) can thawed frozen cherry pie filling
- 3 cups heavy whipping cream
- 1/2 cup powdered sugar
- 1 teaspoon vanilla
- 1 box graham crackers
Step-by-Step Instructions
-
Whip Cream
Beat cream, sugar, and vanilla to stiff peaks. -
Layer Base
Spread cream in 9×13 dish. Add graham layer. -
Add Cherries
Dollop cherries, top with cream. Repeat. -
Chill Overnight
End with cream. Refrigerate 4+ hours. Slice.
12. Cherry Danish Twists
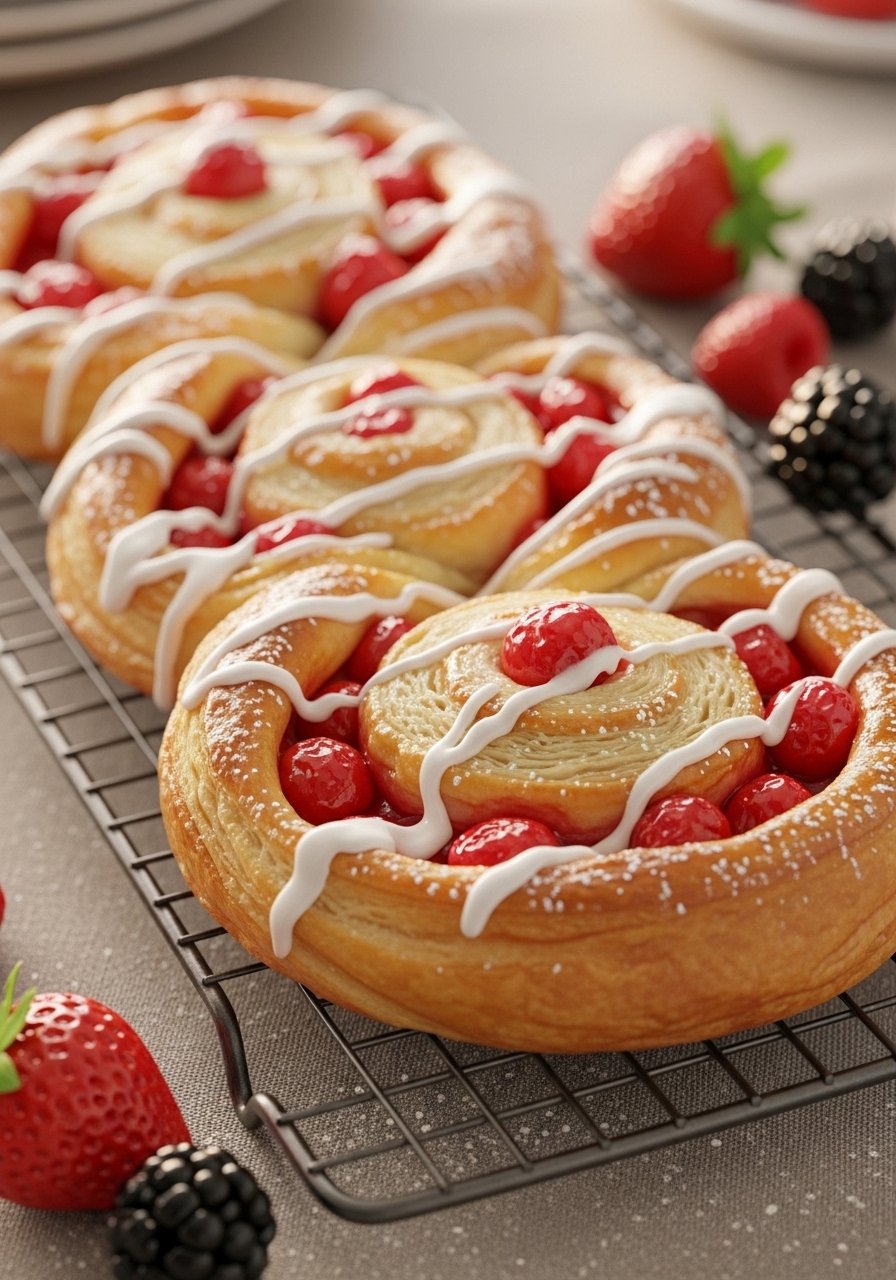
Twisted pastries ooze cherries in flaky dough. Brunch star with glossy icing touch.
Ingredients
- 1 (21-ounce) can thawed frozen cherry pie filling
- 1 sheet puff pastry, thawed
- 4 ounces cream cheese, softened
- 1/4 cup powdered sugar
- 1/2 cup icing (powdered sugar + milk)
Step-by-Step Instructions
-
Preheat and Soften
Heat to 400°F (200°C). Roll pastry to 10×12 rectangle. -
Fill and Twist
Spread cream cheese-sugar mix down center. Add cherries. Cut sides, twist over. -
Bake Puffed
Bake on lined sheet 18-22 minutes until golden. -
Glaze Finish
Drizzle icing. Cool slightly.
FINAL THOUGHTS
You've got endless ways to enjoy that thawed cherry pie filling now. Pick one for tonight—maybe the cobbler for comfort or parfaits for quick joy.
Share your twists in the comments; I love seeing your creations. Keep that pantry staple handy for spontaneous sweets.
Happy baking—you'll make these favorites again and again!