Craving that creamy, nostalgic taste of banana pudding but want to whip up a simple dessert at home? You've got this.
This no-bake treat layers silky vanilla pudding, fresh bananas, and crisp wafers for the ultimate comfort dessert.
It's beginner-friendly, ready in minutes plus chill time, and captures every bit of that classic banana pudding flavor you love.
How To Make Banana Pudding Flavored Dessert
You're making a classic layered banana pudding flavored dessert—creamy vanilla pudding infused with ripe banana essence, sandwiched between buttery wafers and fresh fruit slices. It sets into a cool, dreamy texture with sweet-tart banana notes and a whipped topping crown.
Ingredients
- 2 packages (3.4 oz each) instant vanilla pudding mix: Provides the smooth, custardy base that screams banana pudding flavor.
- 4 cups cold milk: Whole milk for richest creaminess; use 2% if preferred.
- 4-5 ripe bananas, sliced: Firm but spotty for natural sweetness without mushiness.
- 1 box (11 oz) vanilla wafers: Nilla-style for that signature crunch.
- 1 container (8 oz) whipped topping, thawed: Or homemade for extra fluff.
- Optional: 1 tsp banana extract: Boosts flavor if bananas aren't super ripe.
Step-By-Step Instructions
Step 1: Prepare the Pudding Base
Whisk the two packages of instant vanilla pudding mix with 4 cups cold milk in a large bowl. Beat vigorously for 2 minutes until it thickens to a silky consistency—this traps air for lightness and prevents lumps. Let it sit 5 minutes to fully set. This step builds the core banana pudding flavor foundation you'll layer everything over.
Chilling the milk first helps it set faster. Taste and add banana extract if you want intensified flavor without extra fruit.
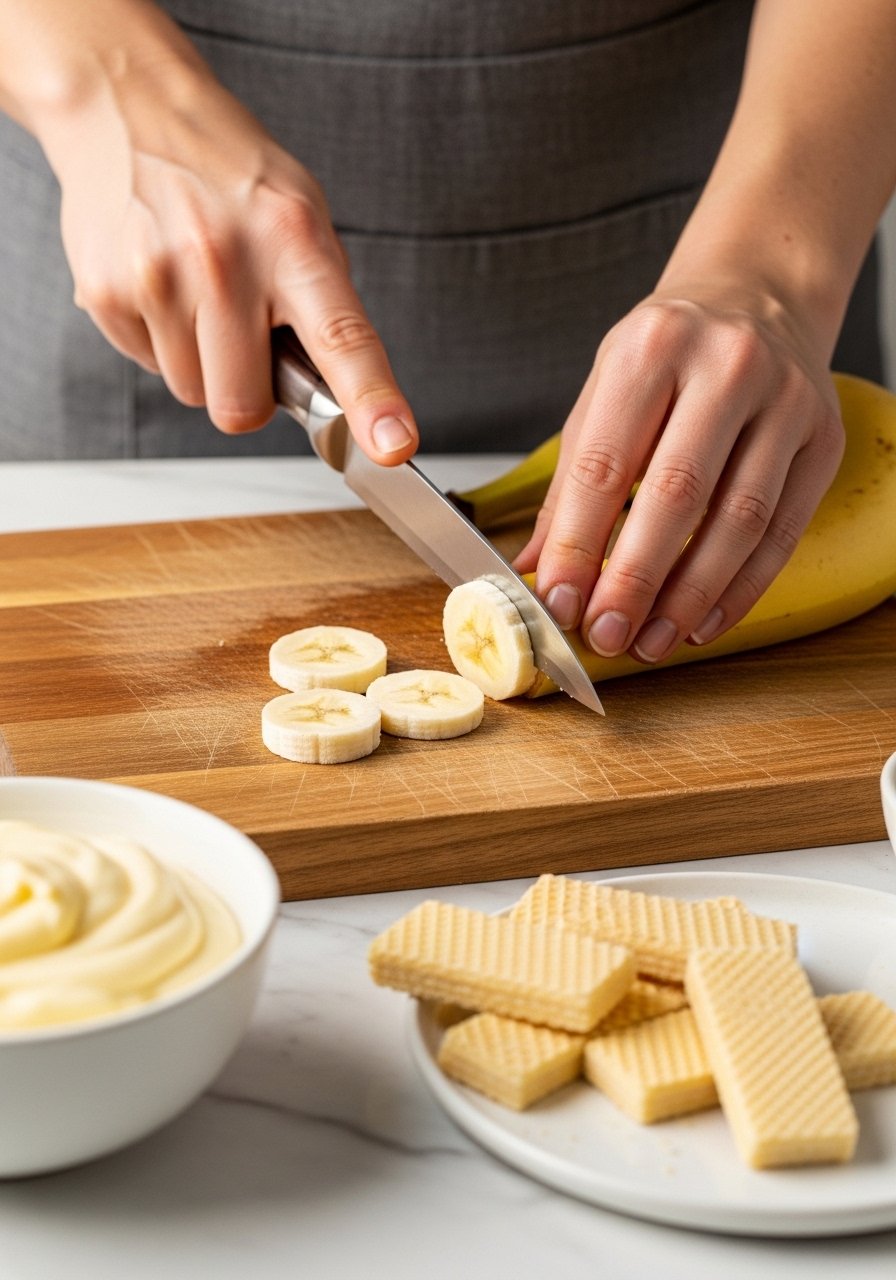
Step 2: Slice the Bananas
Peel 4-5 ripe bananas and slice them into 1/4-inch rounds. Do this right before assembly to keep them from browning—squeeze a bit of lemon juice over if needed. Fresh slices deliver juicy bursts that soak up pudding flavors perfectly.
Uniform slices ensure even layering and pretty presentation. Aim for 20-25 slices total.
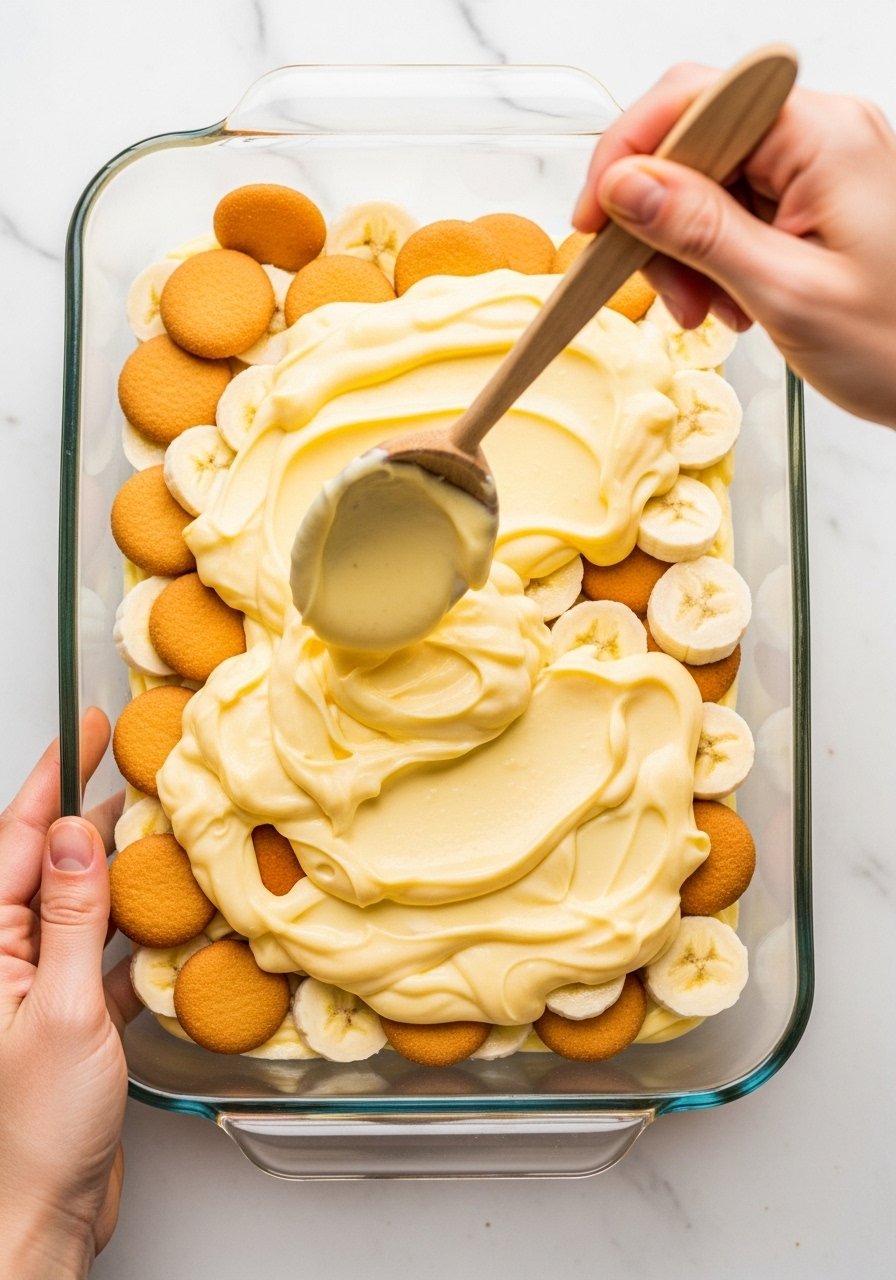
Step 3: Assemble the Layers
In a 9×13-inch dish or trifle bowl, start with a thin pudding layer on the bottom. Add a row of vanilla wafers, then banana slices, followed by a generous pudding layer. Repeat 2-3 times, ending with wafers on top. This builds texture contrast—crisp, creamy, fruity.
Press gently so layers bond without squishing. Save some bananas for the top.
Step 4: Add the Whipped Topping and Chill
Spread thawed whipped topping over the top layer. Crush extra wafers and bananas for garnish. Cover and refrigerate at least 4 hours, ideally overnight—the chilling melds flavors into true banana pudding bliss and softens wafers just right.
Total time: 20 minutes active, 4+ hours chill. Serves 12.
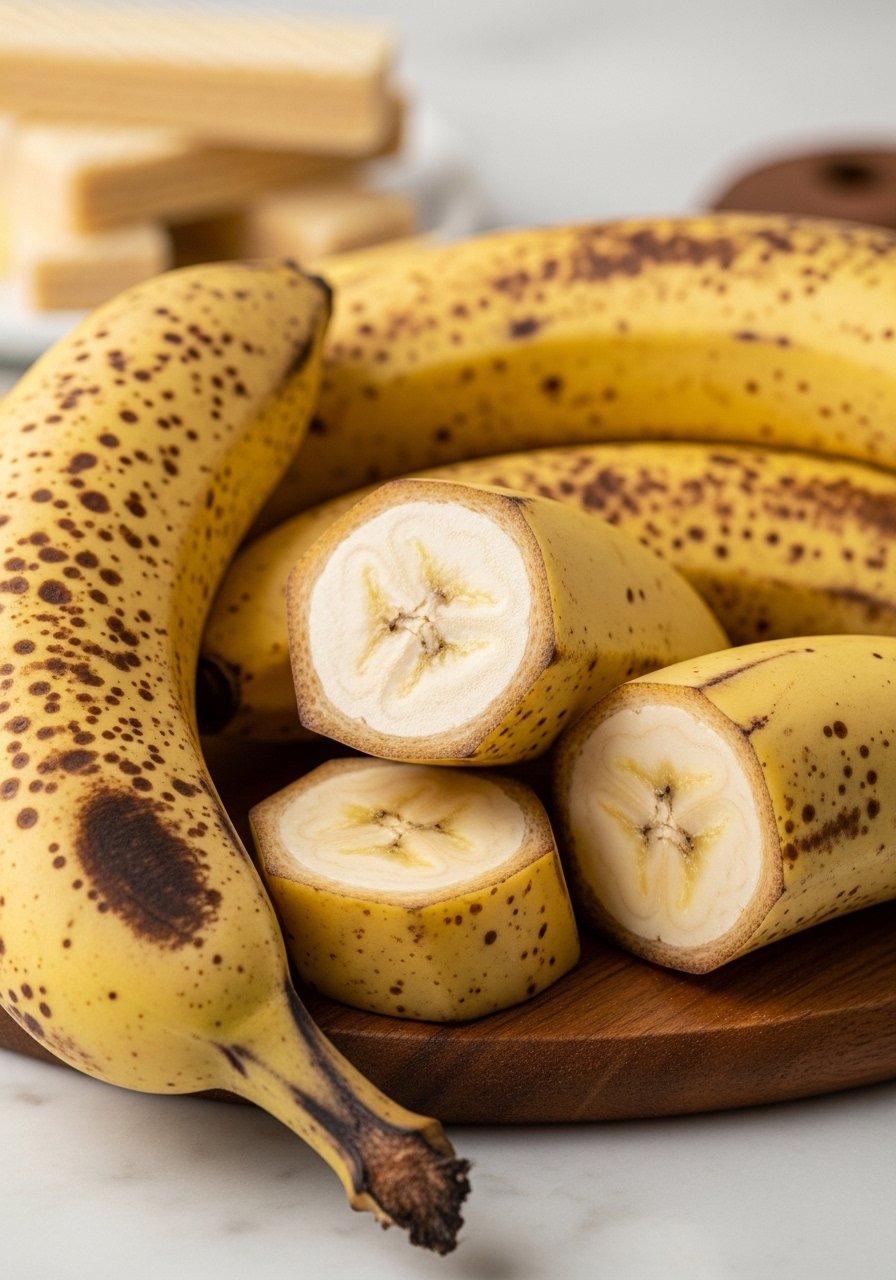
Choosing Ripe Bananas for Best Flavor
Ripe bananas are key to nailing banana pudding taste—they're sweeter and more aromatic. Look for yellow peels with brown spots; avoid green ones, which stay too firm and starchy.
Test ripeness by gentle squeeze: soft but not mushy. If short on time, bake unripe ones at 300°F for 15 minutes to speed ripening.
Store extras in the fridge post-peeling to prevent oxidation.
Layering Tips for Perfect Texture
Layer evenly for balanced bites—too much pudding drowns wafers. Use a trifle dish for visibility or a casserole for easy serving.
Alternate directions with wafers for stability. Spoon pudding gently to avoid displacing fruit.
Pro tip: Chill bowl 10 minutes first; cold surfaces help layers set quicker.
Avoiding Common Beginner Mistakes
Don't skip the chill time—rushing leads to soupy texture. Use cold milk only for pudding; warm causes graininess.
Overripe bananas turn mushy; underripe lack flavor. Measure precisely—extra milk thins it out.
Taste as you go; adjust sweetness with a sprinkle of sugar if needed.
Storage and Make-Ahead Secrets
Cover tightly with plastic wrap pressed to the surface to block air—this keeps it fresh 3-5 days in the fridge.
Freeze portions in airtight containers up to 1 month; thaw overnight for best texture, though wafers soften more.
Portion into jars for grab-and-go; ideal for picnics.
Final Thoughts
You've just created a crowd-pleasing banana pudding flavored dessert that's simple yet indulgent.
Layer by layer, it comes together effortlessly.
Dig in chilled and enjoy that perfect creamy bite—your kitchen's new go-to.